
Saturday, February 20, 2010
Monday, February 15, 2010
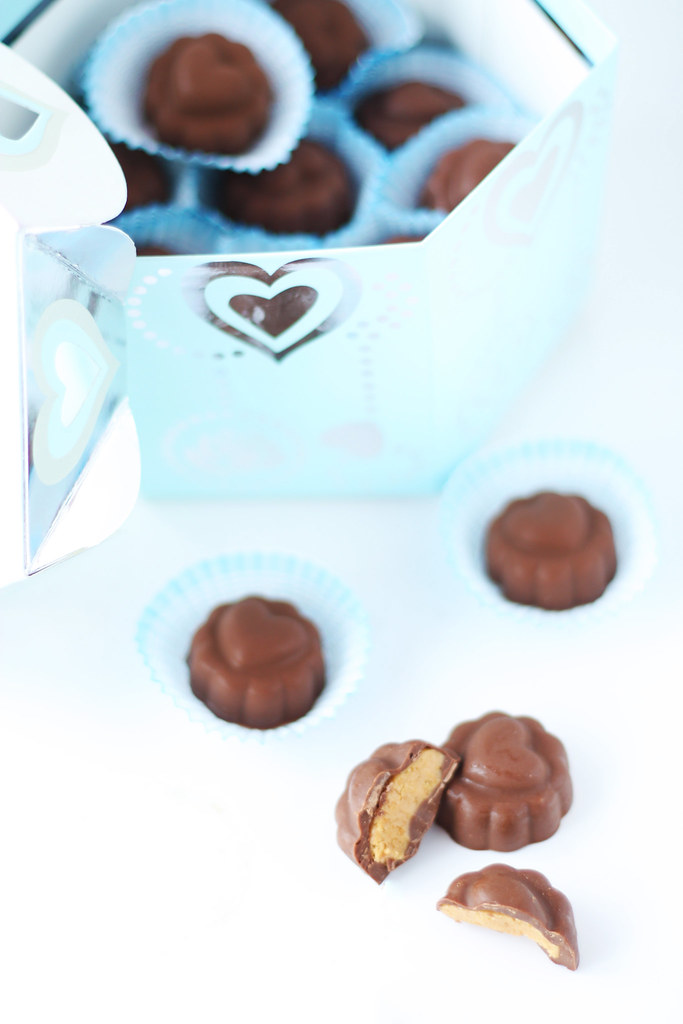
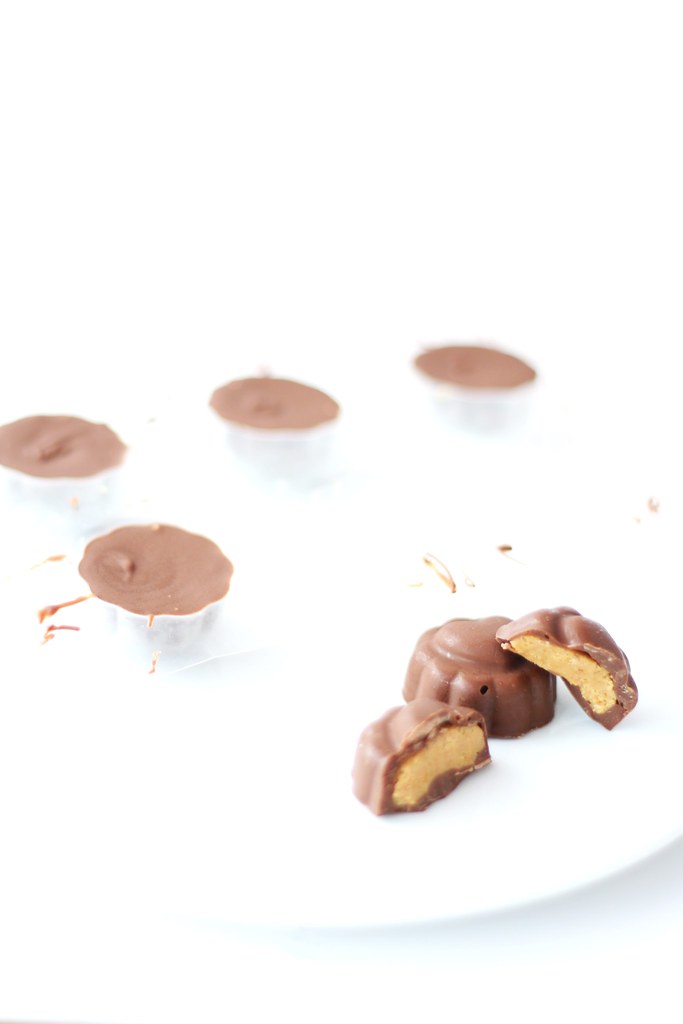
Deciding on a Valentine's Day gift for my boyfriend can be too difficult these days, especially because my boyfriend has a very small and picky sweet tooth...in our case, opposites do attract. You can imagine how overjoyed I was when I watched a big, satisfying smile appear on his face as he bit into (well, more like popped a whole one into his mouth) one of these and deemed it "perfect".
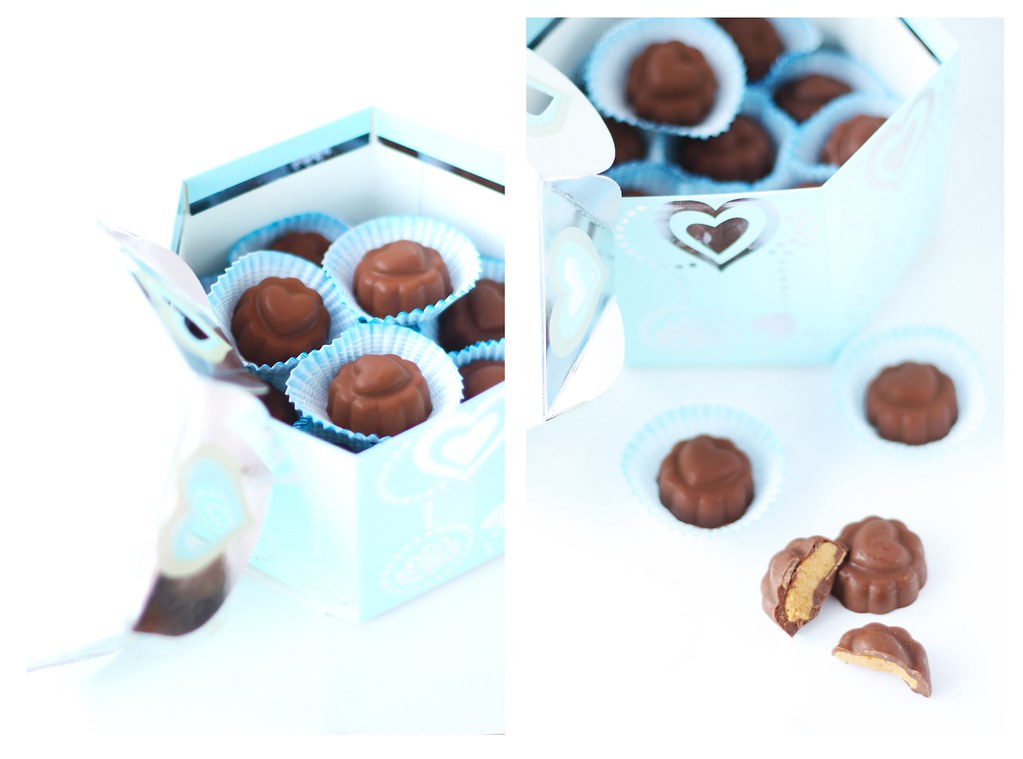
Milk Chocolate Peanut Butter Cups (adapted from Pete Bakes)
12 oz milk chocolate *see Note
1/3 cup creamy peanut butter (I added a couple more tablespoons to suit my preference)
1/4 cup confectioners’ sugar
1 tsp salt (not in the original recipe, but you can omit it, or add more or less depending on your taste)
1/4 cup crushed graham crackers
*I actually ended up with a lot of chocolate left over, so for easy storage I poured the chocolate into the molds I used and let them set up so that I could have solid, portionable pieces. If you want to avoid this problem, and don't feel too lazy, melt a little bit of chocolate at a time, so as not to waste any.
1. in a bowl, mix together the peanut butter, confectioners’ sugar and graham crackers. set aside.
2. in a double boiler, carefully melt the chocolate (set a metal bowl on top of a saucepan with boiling water). alternatively, you can microwave the chocolate in short bursts.
3. using a pastry brush or a clean paintbrush, brush the melted chocolate on the bottom and sides of mini cupcake liners. it’s helpful to stack some the liners together to give more support. when in doubt, add more chocolate, since this will be the base for your candy. place the cupcake liners on a plate or in a cupcake tin and place in the freezer for 10 minutes.
4. remove the liners from the freezer, and place about one teaspoon of the peanut butter mixture in each cup. press down a bit with a spoon to spread. spoon more melted chocolate on top of each cup.
5. place the peanut butter cups back in the freezer for another 15 minutes to set. eat cold or let warm to room temperature before serving.
Thursday, February 11, 2010
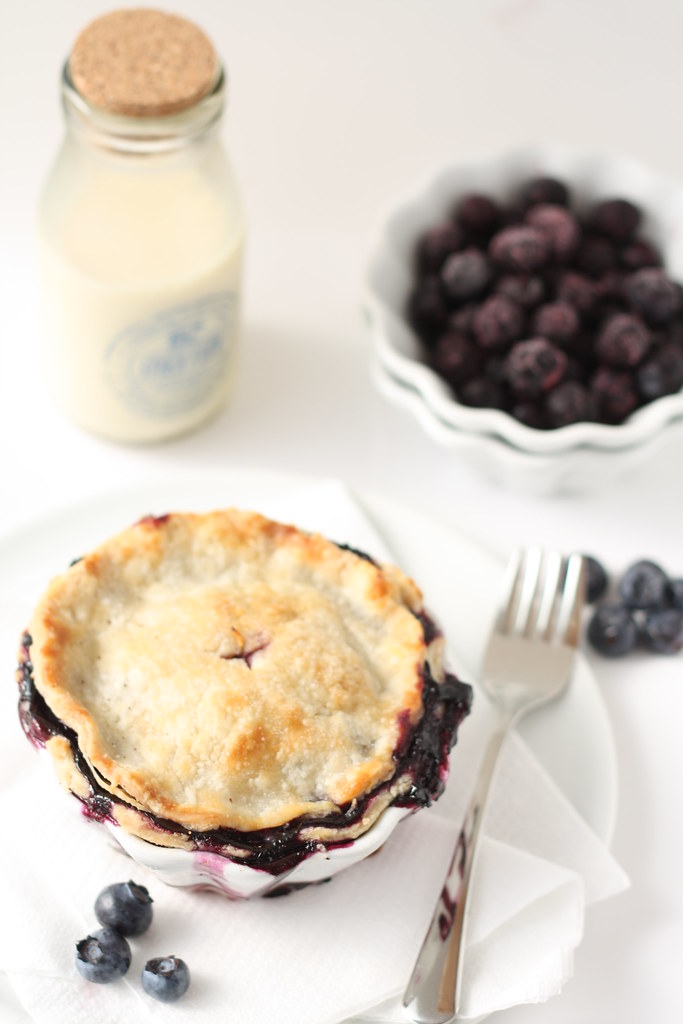
From: Baking: From My Home To Yours, written by Dorie Greenspan.
Ingredients:
Good for Almost Everything Pie Dough for Double Crust , chilled (below)
2 ½ pints fresh blueberries
1 cup of sugar, or a little more, to taste, plus more for dusting
½ cup all purpose flour
Pinch of salt
Coarsely grated zest of ½ lemon
Squirt of fresh lemon juice, or a little more, to taste
¼ cup dry bread crumbs (you can use packaged unseasoned crumbs)
1 large egg, beaten with 1 tsp of water, for egg wash
Sugar, for dusting
Getting Ready: Butter a 9-inch pie plate (Dorie uses a standard Pyrex pie plate).
Working on a well-floured surface (or between wax paper or plastic wrap), roll out one piece of the dough to a thickness of about 1/8 – inch. Fit the dough onto the buttered pie plate and trim the edges to a ½ inch overhang. Roll the other piece of dough into a 1/8 inch thick circle and place it on a baking sheet lined with parchment or a silicone mat. Cover both the circle and the pie plate with plastic wrap and refrigerate while you pre-heat the oven and prepare the filling.
Getting Ready to Bake: Position a rack in the lower third of the oven and pre-heat the oven to 425 degrees F.
Put the berries in a large bowl and gently stir in the sugar, flour, salt, zest and juice; let sit for about 5 minutes. Taste the filling and add more sugar and/or lemon juice, if needed.
Remove the pie shell and top crust from the refrigerator. Sprinkle an even layer of the breadcrumbs over the bottom of the shell. Give the filling a last stir and turn it into the crust.
Using your fingertips, moisten the rim of the bottom crust with a little cold water. Center the top crust over the filling and gently press the top crust against the bottom. Either fold the overhang from the top crust under the bottom crust and crimp the edges attractively or press the top crust against the bottom crust and trim the overhang from both crusts even with the rim of the pie plate. If you’ve pressed and trimmed the crust, use the tines of a fork to press the two crusts together securely. Using a small, sharp knife, cut 4 slits in the top crust crust and cut a circle out of the center, then lift the plate onto the baking sheet. (If you have time, refrigerate the pie for about 30 minutes. The pie can also be wrapped airtight and frozen for up to 2 months. Glaze and sugar it before you put it in the over and add at least 15 minutes to the baking time).
Brush the top crust with the egg wash, then sprinkle the crust with a little sugar, just to give it sparkle.
Bake the pie for 30 minutes. Reduce oven temperature to 375 degrees F, and bake the pie for another 30 minutes or so (total baking time is about an hour) or until the crust is a beautiful golden brown and the filling is bubbling up through the slits. If the crust seems to be browning too quickly, make a loose foil tent for the pie.
Transfer the pie to a rack and let it cool and settle for at least 30 minutes before serving.
Good for Almost Everything Pie Dough
For a 9 inch Double Crust
3 cups all purpose flour
¼ cup sugar
1 ½ tsp salt
2 ½ sticks very cold unsalted butter, cut into tbsp size pieces
1/3 cup very cold vegetable shortening, cut into 4 pieces (I opted for all butter, just my preference)
About ½ cup ice water
Put the flour, sugar, and salt in a food processor fitted with a metal blade, pulse just to combine the ingredients. Drop in the butter and shortening and pulse only until the butter and shortening are cut into the flour. Don’t overdo the mixing- what you’re aiming for is to have some pieces the size of fat green peas and others the size of barley. Pulsing the machine on and off, gradually add about 6 tbsps of the water- add a little water and pulse once, add some more water, pulse again and keep going that way. Then use a few long pulses to get the water into the flour. If, after a dozen or so pulses, the dough doesn’t look evenly moistened or form soft curds, pulse in as much of the remaining water as necessary, or even a few drops more, to get a dough that will stick together when pinched. Big pieces of butter are fine. Scrape the dough out of the bowl and onto a work surface.
Divide the dough in half. Gather each half into a ball, flatten each ball into a disk and wrap each half in plastic. Refrigerate the dough for at least 1 hour before rolling (if your ingredients were very cold and you worked quickly, though, you might be able to roll the dough immediately: the dough should be as cold as if it had just come out of the fridge).
To Roll Out the Dough: Have a buttered 9 inch pie plate at hand.
You can roll the dough out onto a floured surface or between sheets of wax paper or plastic wrap or in a rolling slipcover. If you’re working on a counter, turn the dough over frequently and keep the counter floured. If you are rolling between paper, plastic or in a slipcover, make sure to turn the dough over often and to life the paper, plastic, or cover frequently so that it doesn’t roll into the dough and form creases.
If you’ve got time, slide the rolled out dough into the fridge for about 20 minutes to rest and firm up.
Thursday, February 4, 2010
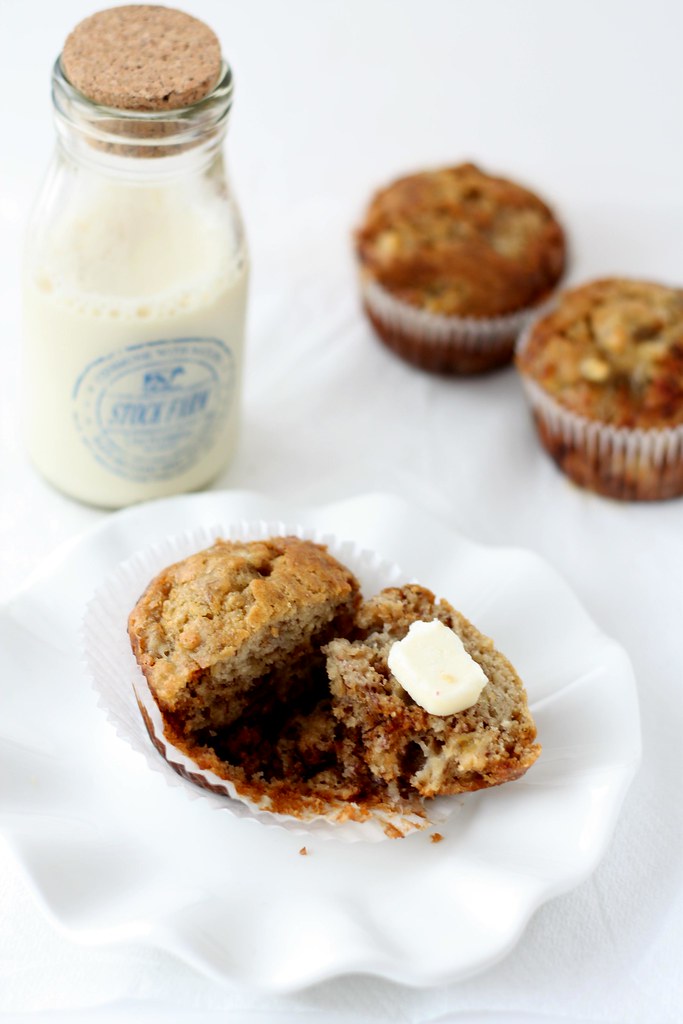
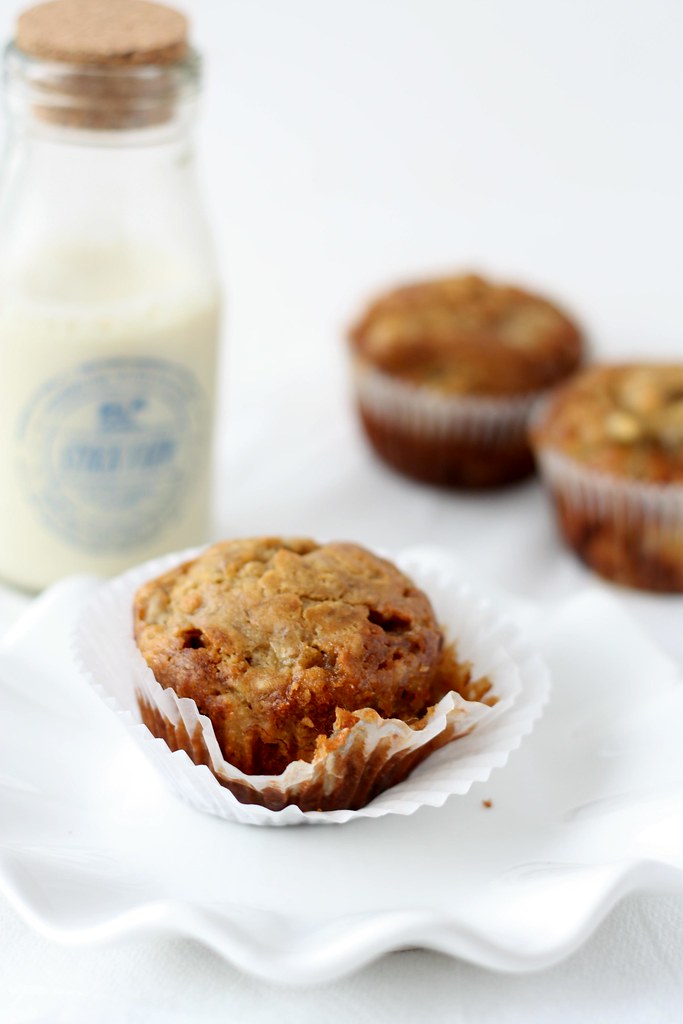
Banana Bread Muffins
2 cups all-purpose flour
1 teaspoon baking soda
1/4 teaspoon salt
1/2 cup butter
3/4 cup brown sugar
2 eggs, beaten
2 1/3 cups mashed overripe bananas
Preheat oven to 350 degrees F (175 degrees C). Lightly grease a 9x5 inch loaf pan.
In a large bowl, combine flour, baking soda and salt. In a separate bowl, cream together butter and brown sugar. Stir in eggs and mashed bananas until well blended. Stir banana mixture into flour mixture; stir just to moisten. Pour batter into prepared loaf pan.
Bake in preheated oven for 60 to 65 minutes, until a toothpick inserted into center of the loaf comes out clean. Let bread cool in pan for 10 minutes, then turn out onto a wire rack.
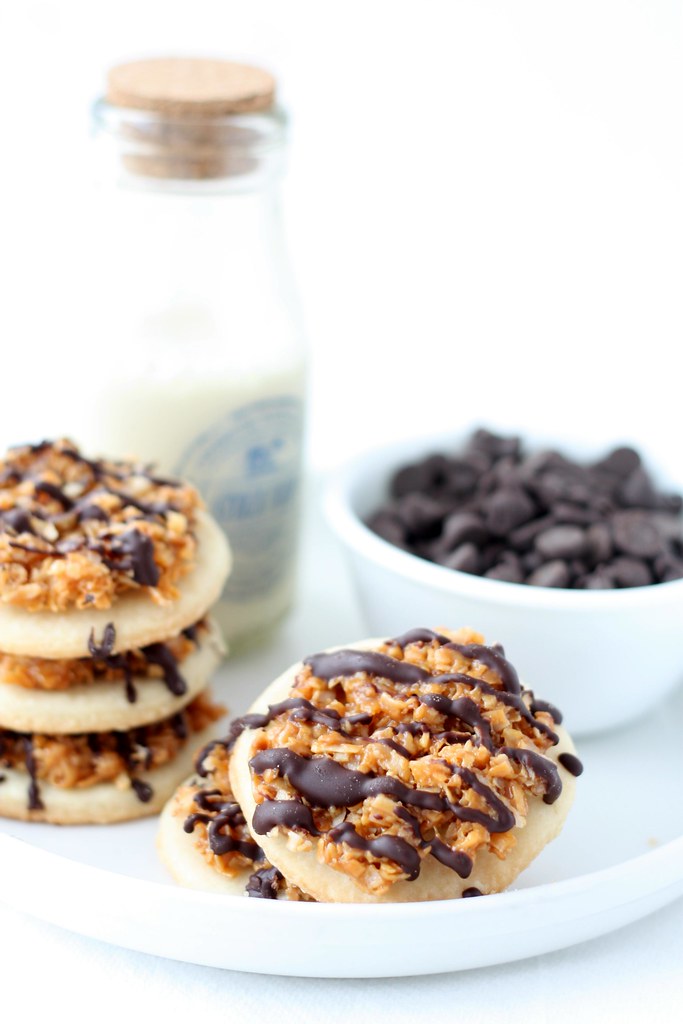
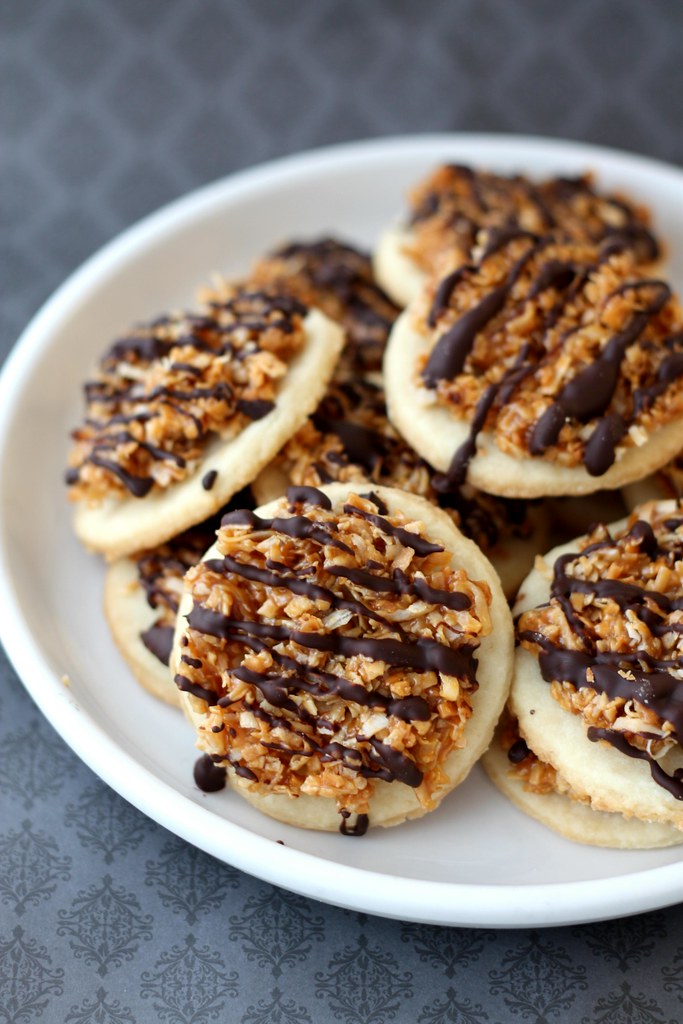 I had my very first Samoas cookie rather recently while visiting my sister-in-law and her husband last year. Apparently, they're his favorite and as we were all out shopping he was immediately drawn to the Girl Scouts who had set up camp outside and returned triumphantly with several boxes of these babies. So, appropriately, I thought I'd make them for real (real as in sans preservatives and novel-sized ingredient list) and bring them along for our next visit. I deviated from the recipe a bit by opting out of dipping the bottom of the cookies in chocolate...that's just too much chocolate for me...and now no worry about melty-chocolately fingers.
Samoas Cookies (adapted from Baking Bites)
1 cup butter, softened
1/2 cup sugar
2 cups all purpose flour
1/4 teaspoon baking powder
1/2 teaspoon salt
1/2 teaspoon vanilla extract
up to 2 tablespoons milk
Preheat oven to 350F.
Cream together butter and sugar in a large bowl. Mix in flour, baking powder and salt at a low speed, next, the vanilla and milk, adding in the milk only as needed to make the dough come together without being sticky (you may not need any at all). The dough should come together into a soft, pliable ball. Add in a bit of extra flour if your dough seems sticky.
It's easiest to roll the dough out in 2 or 3 batches (between pieces of wax (or parchment) paper to about 1/4-inch thickness (or a little thinner) using a 1 1/2-inch cookie cutter to make rounds. Place on a parchment lined (or on silicone mat) baking sheet and make a hole in the center. I used the small end of a large round piping tip. Nicole comments that you can use a knife, or the end of a wide straw, to cut a smaller center hole. Repeat until the dough is used up (it's okay to re-roll, this dough is shortbread-like and very forgiving.)
Bake cookies for 10-12 minutes, until bottoms are very lightly golden brown around the edges.
Cool for a few minutes on the baking sheet, to allow them to firm up slightly, then transfer to a wire rack to cool completely.
3 cups shredded coconut (sweetened or unsweetened)
12-ounces good-quality chewy caramels
1/4 teaspoon salt
3 tablespoons milk
8 ounces dark or semisweet chocolate (or milk chocolate, if you prefer)
Preheat oven to 300 degrees (F)
Spread coconut evenly on a rimmed baking sheet and toast 20 minutes, stirring every 5 minutes, until coconut is golden. Watch carefully, especially near the end of toasting time; the coconut toasts very quickly once it begins to become golden.
Cool on baking sheet, stirring occasionally. Set aside.
Unwrap the caramels and place in a large microwave-safe bowl with milk and salt. Cook on high for 3-4 minutes, stopping to stir a few times to help the caramel melt. When smooth, fold in toasted coconut with a spatula.
Using the spatula or a small offset spatula, spread topping on cooled cookies, using about 2-3 teaspoons per cookie. Reheat caramel for a few seconds in the microwave if it begins to firm up, to make it soft and spreadable once again.
While topping sets up, melt chocolate in a small bowl. Heat on high in the microwave in 45 second intervals, stirring thoroughly to prevent scorching. (I melted mine stovetop using double boiler method.) Dip the base of each cookie into the chocolate and place on a clean piece of parchment paper (I used silicone baking mats instead). Transfer all remaining chocolate into a piping bag or a ziplock bag with the corner snipped off and drizzle finished cookies with chocolate. (Melt a bit of additional chocolate, if there is not quite enough for each cookie.)
Let chocolate set completely before storing in an airtight container..jpg)