Thursday, December 16, 2010
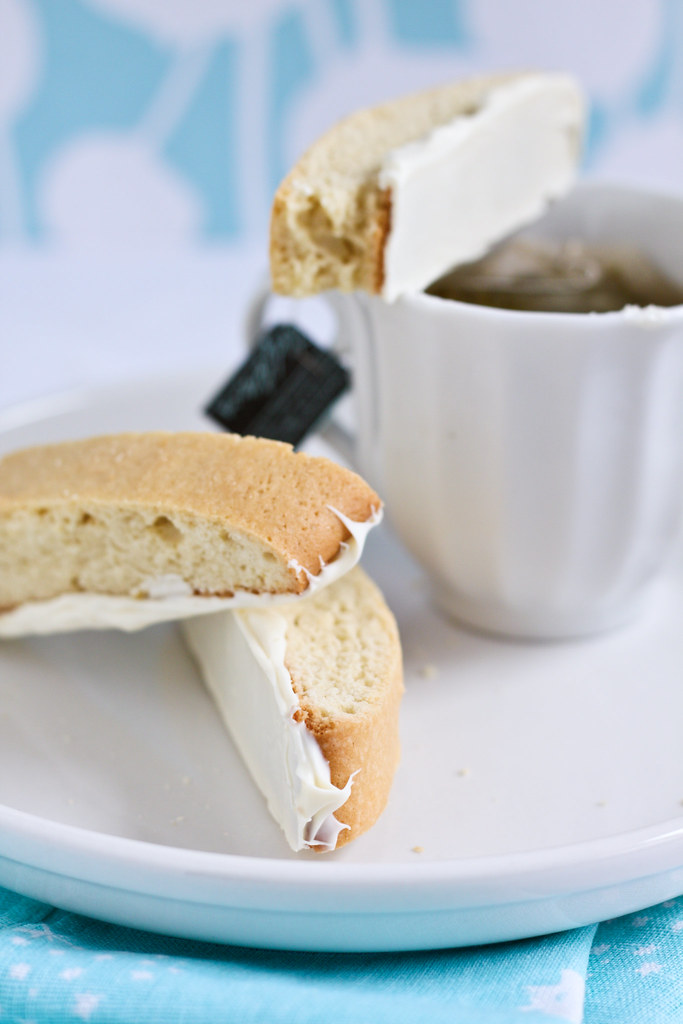
These biscotti were whipped up short notice to fill a sudden craving my mom had for something sweet. I've had quite a few biscotti recipes bookmarked and was really intrigued by all the different methods used. Some recipes used butter, others oil, or even both. And a few recipes I came across used neither. For my purpose, I decided to go the traditional route and make my biscotti with olive oil.
Now, if you know me well enough by now, I hardly ever make a full recipe. However, this time I went one step further and actually didn't complete the full list of instructions. Biscotti gets its crunchy texture from a "twice-baked" method. The dough is formed into a log, baked, removed from the oven, sliced, then baked again. This makes biscotti the perfect dipping cookie for coffee, teas, or simply milk. However, I don't drink coffee or milk and although I love tea, I don't have it all too often. So I decided to make "soft-baked" biscotti. After baking the dough as a log, removing it from the oven, and slicing it, I allowed the cookies to cool and left it at that. Then I dipped the bottoms in white chocolate...well actually, I tried to dip them, but without success. What I found worked better and yielded a more aesthetically pleasing result was simply spooning the melted chocolate onto the bottom of the biscotti, then spreading it cleanly with a small angled spatula. Then I set them carefully down on their rounded (undipped) side and allowed them to dry.
Well, whichever way you decide to make these--crisp or soft, dipped or spread with chocolate--I assure you, you'll love the combination of delicate
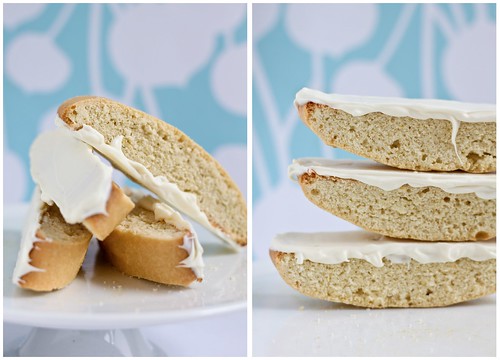
Below I'm posting the recipe in its entirety. Including the steps that I decided to skip. Because I tend to adapt recipes, I often make mistakes when retyping them into my blog. So please if you see any discrepancies, let me know and I will amend it as soon as possible.
White Chocolate Lemon Biscotti (adapted from here and here)
1/4 cup light olive oil
3/4 cup white sugar
2 teaspoons vanilla extract
1 teaspoon lemon extract (or to taste)
2 teaspoons lemon zest
2 eggs
1 3/4 cups all-purpose flour
1/4 teaspoon salt
1 teaspoon baking powder
1 1/4 cups (6-ounce) bar premium white chocolate, chopped
Preheat the oven to 300 degrees F. In a large bowl, mix together oil and sugar until well blended. mix in the vanilla and lemon extracts and zest, then beat in the eggs. Combine flour, salt, and baking powder; gradually stir into egg mixture.
Divide dough in half. Form two logs (12x2 inches) on a cookie sheet that has been lined with parchment paper. Dough will be very sticky; wet hands with cool water to handle dough more easily.
Bake for 35 minutes in the preheated oven, or until logs are light brown. Remove from oven, and set aside to cool for 10 minutes. Reduce oven heat to 275 degrees F.
Cut logs on diagonal into 3/4 inch thick slices. Lay on sides on parchment covered cookie sheet. Bake approximately 8 to 10 minutes, or until dry; cool.
Meanwhile, melt the white chocolate in a double boiler or using your preferred method. When the biscotti is cool, dip, spread, or drizzle white chocolate and allow the cookies to dry on a cookie sheet before storing in an air tight container.
Friday, December 10, 2010

After a long hiatus, this blog is finally back in action. During the past few months of this break I've been able to concentrate on school and clean up my diet. Perhaps a greater influence on my blogging than my academic schedule has been my attempt to overcome my dependency on sugary sweets. Today I am very happy to say that one of these bad boys is the first homemade treat that I've had in months. And as delicious as it was, there was something different. The way I felt when I ate it was different...less ravenous. I savored every bite of it, but when it was over I didn't run back for more.
Now although this new found lifestyle may mean great things for me, I'm not exactly sure what the significance is for my blogging. This holiday season will definitely warrant much more baking and testing of my self control. So for now, I'll resist making any predictions until the end of the holidays. Enjoy yours, as I enjoy mine...and try these cupcakes!
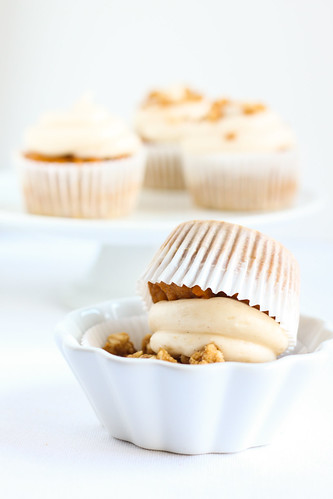
These cupcakes were made using the leftover batter I had after making a pumpkin bundt cake for an end-of-the-semester/Christmas party on Wednesday night. Like the cake, they are topped with a cinnamon cream cheese frosting, but are taken a step further with a sprinkling of brown sugar crumble.
Pumpkin Cupcakes (allrecipes)
2 cups white sugar
1 1/4 cups vegetable oil
1 teaspoon vanilla extract
2 cups canned pumpkin
4 eggs
2 cups all-purpose flour
3 teaspoons baking powder
2 teaspoons baking soda
1/4 teaspoon salt
2 teaspoons pumpkin pie spice
Preheat the oven to 350 degrees F. Sift together the flour, baking powder, baking soda, salt, and spices. Set aside.
In a large bowl, combine sugar and oil. Blend in vanilla and pumpkin, then beat in eggs one at a time. Gradually beat in flour mixture. Pour batter in muffin tin, filling cups 3/4 full.
Bake in the preheated oven for 18-20 minutes, or until a toothpick inserted into the middle of a cupcake comes out clean.
Cinnamon Cream Cheese Frosting (allrecipes)
2 (8 ounce) packages cream cheese, softened
1/2 cup butter, softened
2 cups sifted powdered sugar
1 teaspoon vanilla extract
1 teaspoon cinnamon
In a medium bowl, cream together the cream cheese and butter until smooth. Mix in the vanilla, then gradually stir in the powdered sugar. Mix in cinnamon, add more if desired. Store in the refrigerator after use.
Brown Sugar Crumble (allrecipes)
1/2 cup quick-cooking oats
1/2 cup all-purpose flour
1/2 cup brown sugar
1/8 teaspoon baking powder
1/8 teaspoon baking soda
1/4 cup butter, melted
Line a sheet pan with foil. Combine oats, flour, brown sugar, baking powder, baking soda, and melted butter together. Crumble onto sheet pan, cover and refrigerate for at least 1 hour. Preheat oven to 350 degrees F. Bake crumble for 10 minutes or until brown, watching carefully.

Thursday, August 5, 2010
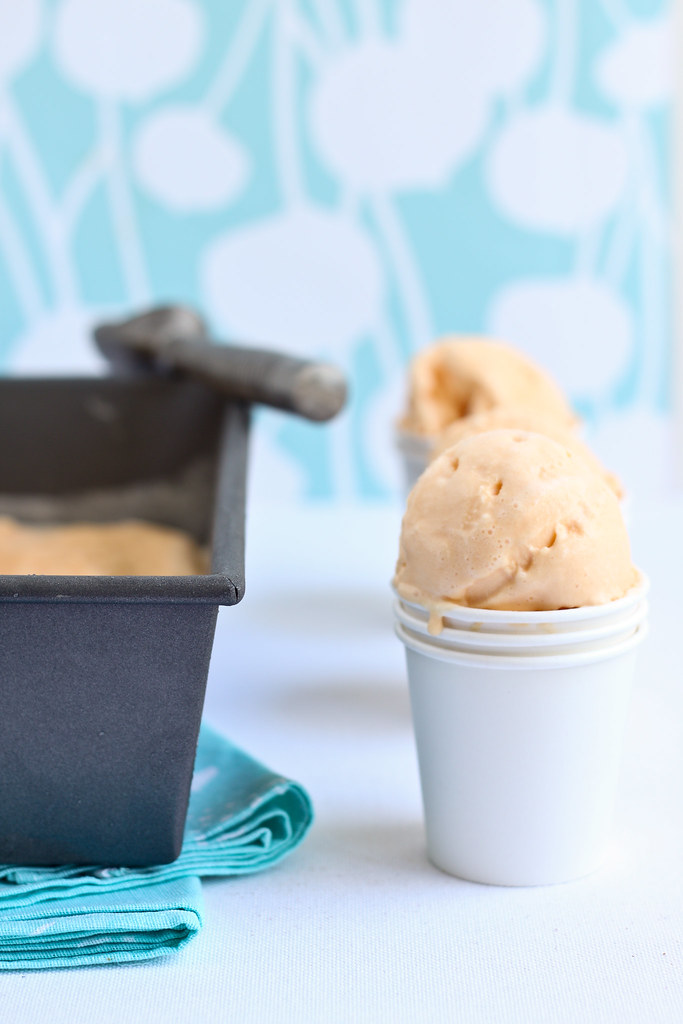
I only recently discovered my fondness for Orange Sherbet. I recall throughout my lifetime hearing others exclaim their love for the treat and disregarding them almost instantly. It was a chance encounter with a grocery store Orange Sherbet ice cream cake, something that I would normally overlook without a second thought. Soon, a small slice turned into a second and a third...an accompaniment to my breakfast cereal, an after school snack...until one day, it was gone. There was something undeniably nostalgic about the flavor that I just couldn't place. And then suddenly, I had it. I even called my sister from across the house to have a taste and confirm my suspicion. Orange Sherbet tasted oddly like...Fruity Pebbles. Yes, Fruity Pebbles: a childhood favorite from my pre-gourmet days. A flavor-memory that I still find hard to resist when it crosses my path. Definitely a guilty pleasure of mine.
Behold, my hand-churned orange sherbet. Now before you start thinking that you ought to be impressed...my decision to hand-churn the ice cream was based more on desperation than inspiration. I had prepared and chilled my rather impromptu sherbet mixture and was starting to assemble the ice cream maker attachment on my KitchenAid stand mixer when I realized that the adapter was missing. What ensued first was panic, then frustration, and finally...insanity.
My freezer bowl was already out and starting to condensate. I had to act quick. I grabbed the chilled mixture and poured it into the bowl. I hastily set the microwave timer to twenty minutes, grabbed the plastic churner and began to spin the bowl with my left hand, while my right hand clenched tightly onto the top of the churner. I tried my best to keep my knuckles away from the freezing mixture. The end result was light and slightly creamy, with the tiny ice crystals characteristic of a sherbet. Thanks to my unwavering will and endurance, the consistency is exactly what I expected to achieve if I had used the ice cream maker.
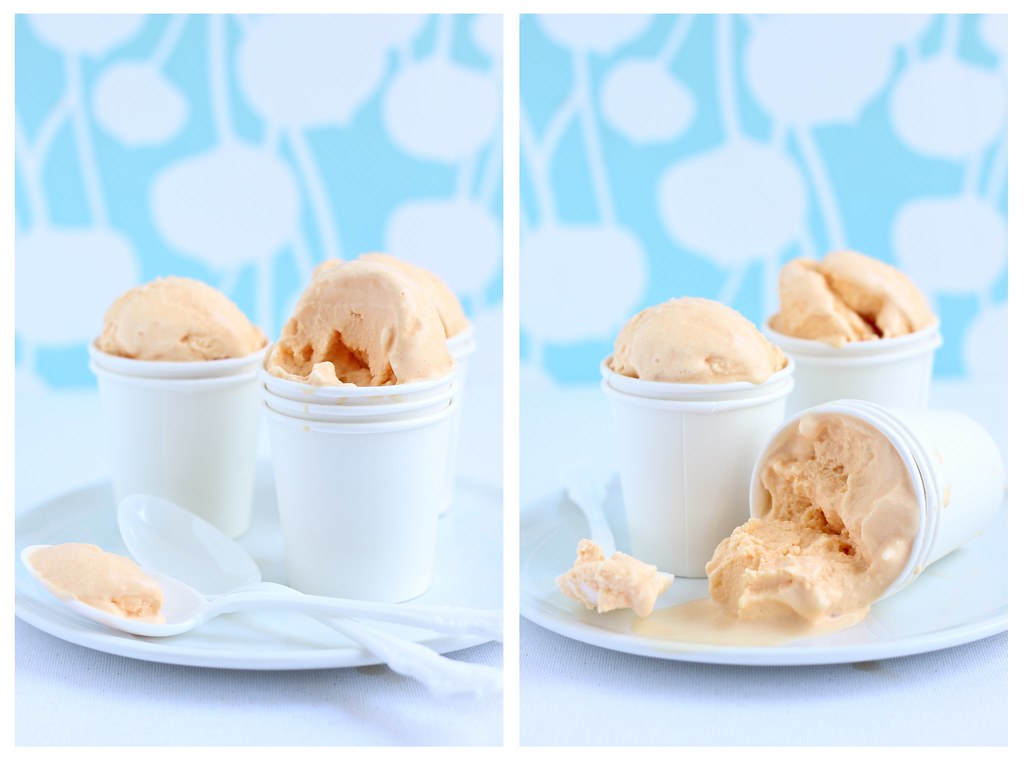
This orange sherbet is not so much the result of a recipe, but the outcome of trial and error. I'm so embarrassed by my method that I won't even attempt to post a recipe or instructions. I simply took a few scoops of vanilla ice cream (cheating? perhaps, but I told you this was very impromptu), a teaspoon and a half of vanilla, a splash of milk perhaps (I used soy), and enough orange juice concentrate to achieve the flavor you want.
Not really faithful to a real Sherbet at all I suppose, but it satisfied my (Fruity Pebble) craving.

Wednesday, July 28, 2010
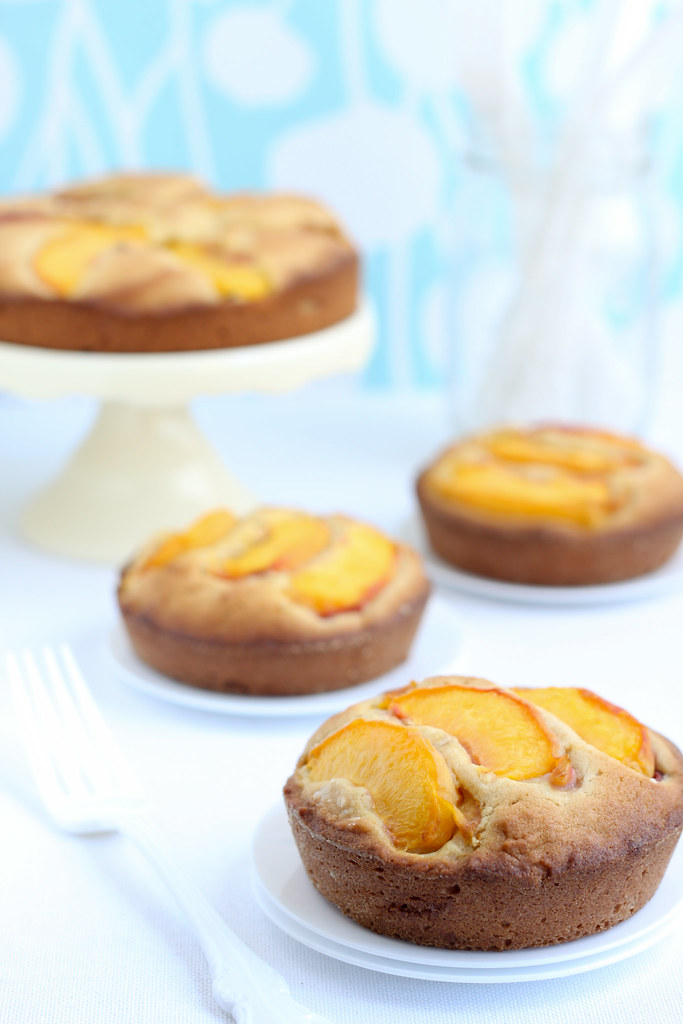
I'm a bit apprehensive as I type this and soon you'll understand why. When my mother came home yesterday she brought along a small bag of peaches from her best friend's backyard. She told me that she would be out of town for the next two days and knowing that most of my clandestine baking happens while she's gone, she commissioned me to make a peach cobbler. Nothing fancy, no individual ramekins: just one simple cobbler.
Well I guess I don't take directions well unless they're part of a recipe that promises something delicious at the end. I convinced myself that if I made an alternative to cobbler that was simple, yet delicious enough to win over my mother, I would be in the clear. So I began my search for the perfect simple peach recipe. I found my answer in Dorie Greenspan's Dimply Plum (Well, Anything) Cake. I've always been an obedient daughter, but I suppose baking must bring out my inner rebel, because I had the audacity to make miniature cakes as well.
The cake smelled delicious sitting in the oven and I was so sure of my success. The first downhill turn was when I pulled the cakes out (the 6" cake and the 3" mini cakes) at 20 minutes and found them a little too dark along the edges. I tried to stay hopeful as I proceeded with picture taking and when I finally shut off my camera, I grabbed a slice and took a bite straight off the prop fork. Dry. Well, at least, not moist enough for my liking. Nothing too spectacular in terms of taste, but I'll also admit that the peaches from her friend didn't taste so good on their own to begin with.
Even still, I was disappointed and consequently worried about how my mother will receive the not-so-cobblery cakes when she returns. Whenever I run into a recipe I don't favor, especially from a source as reliable as Dorie Greenspan, my first assumption is that the fault is my own. Can someone please let me know if the cake is meant to be slightly dry? Am I missing out on something?
I'll be sure to give it a try again tomorrow morning and hope for the best, but my expectations aren't high.
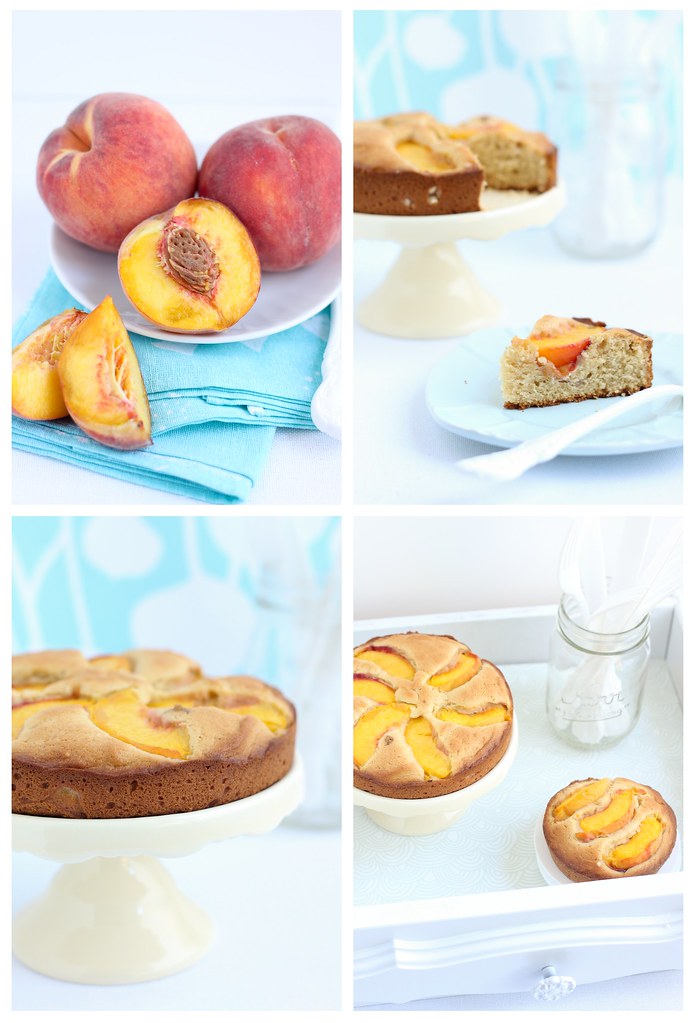
You can find the recipe here.
* Just as I went to retrieve the link for the recipe, I skimmed through the recipe commentary over at Bake-En and am instilled with new hope. "Dorie says that the first day the cake is like corn bread and the 2nd and 3rd days it's soft and moist. Perhaps I'll fall in love with it tomorrow." This is somewhat reassuring and now I am a little more excited for what breakfast might reveal. Perhaps it's the juices of the fruit permeating through the cake that makes it more moist over time...but for now that's just speculation. I'll find out for sure tomorrow. I knew Dorie wouldn't let me down so hard...
Meanwhile below is a Before & After project I took on, my first really. I saw this worn-out, shabby chic end table outside of a neighbor's house as I drove to work one morning. When it was still there on my way home from work the next day, I quickly pulled over and timidly went to go knock on the door and inquire about it. Fortunately for me, the homeowner walked right out to retrieve her child's toys outside and when I asked her about it, she gladly let me have it for free. I giddily placed it in my trunk and drove the half a block to my house where I immediately got started. After smoothing it down with a power sander, I vacuumed it and wiped it down. Then the next day I spray painted it bright white. Dozens of adorable color combinations flooded my mind, but for my first project I decided to keep it simple and clean...and easy to coordinate. It took me years of admiring Before & After projects for me to finally tackle one myself. Now I won't hesitate to pull over when I see a promising find. You can click here and here to see the "before" photos.

Sunday, July 25, 2010
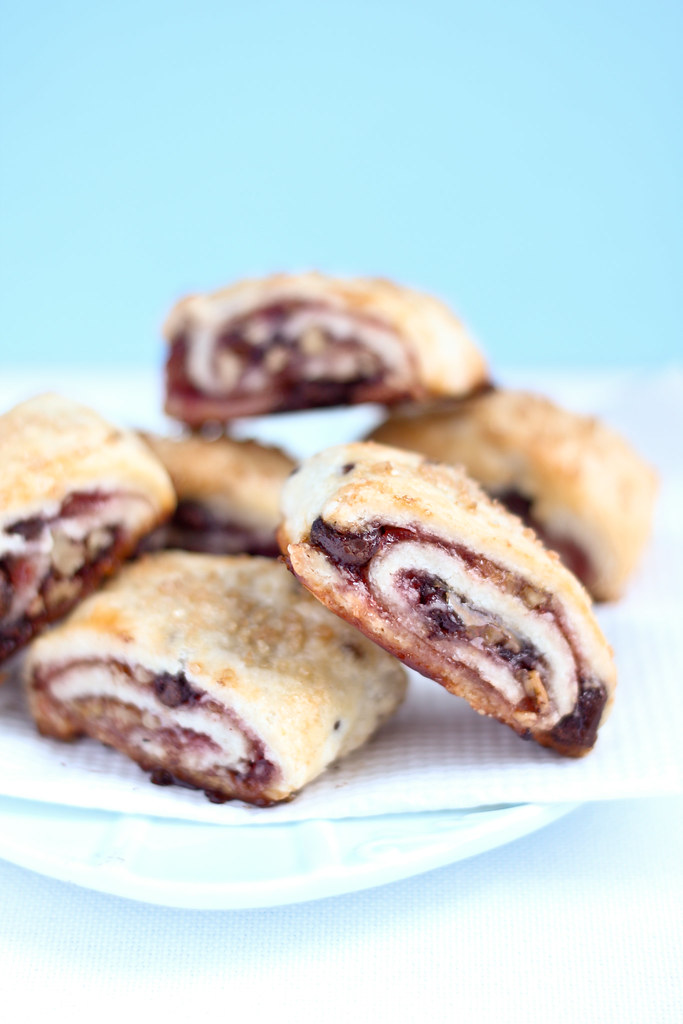
Remember how I confessed to just not being a "cookie lover"? Well, there must exist some technicality that prevents rugelach from being classified as a cookie, because as of today...I love rugelach. More realistically, I could love rugelach. I made an almost classic variation with raspberry jam, walnuts, and semisweet chocolate chips. The recipe is great, but I had mixed feelings about the batch I made. For one, I'm not a big fan of chocolate. I know...a food blogger that isn't fond of chocolate or cookies, some might consider it an oxymoron. If and when I make these again, I'll probably cut down on the chocolate and definitely make the trip to go buy some currants or dried fruit, because although the cookie itself was flaky and tender, the texture of the filling left much to be desired. I'm also sure that the fruity flavor of the currants would lighten up the richness of the chocolate. So I suppose what I'm saying is that I'm not in love with these cookies as much as I am in love with the idea of what they could be.
Please don't let my rambling stop you from trying these cookies. The fact that they're Dorie's should be enough motivation to get you in the kitchen. And besides, the majority of my reservations are based solely on my inability to stick to the recipe in the first place...as soon as I add those currants, I might as well delete this whole rant and simply post five gold stars underneath picture.
Enough, enough. Run away before I start up again, you can find the recipe here.
Tuesday, July 20, 2010
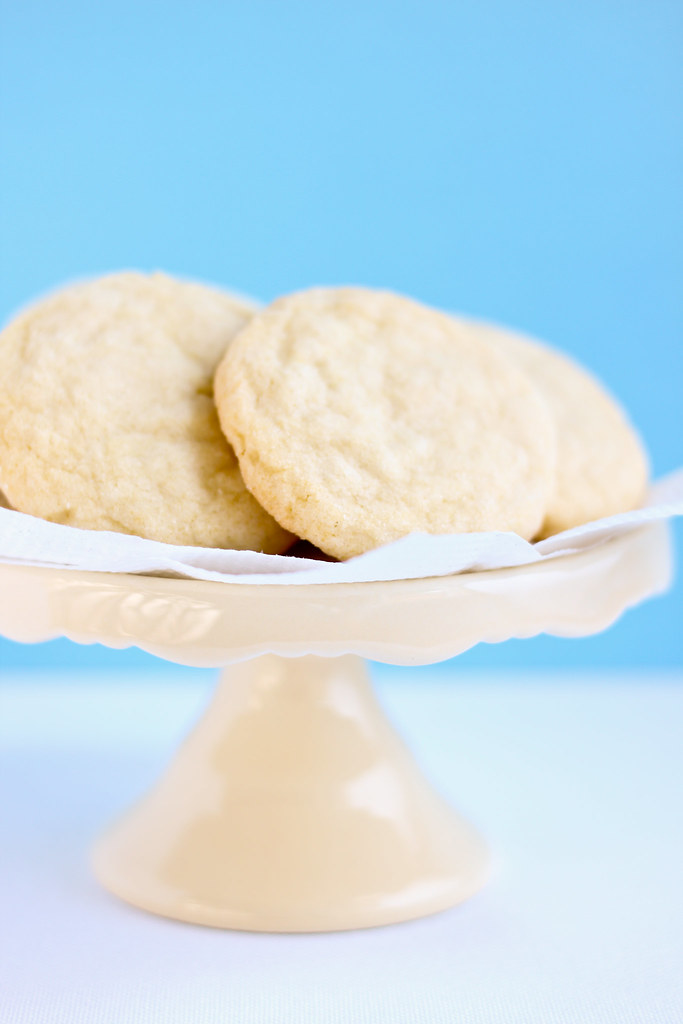
One of my favorite cookies there is the simple Lemon Pout. A soft, chewy sugar cookie with an undeniable lemon zing, perfectly offset by the crunch of sparkling sugar. I finally convinced myself into buying a microplane zester just so I could make these cookies. The recipe I found yields the most perfectly soft and chewy cookies. But beware: "store them in an airtight container to keep them nice and soft" is not a suggestion, it is a must. I left a few of the best looking cookies on a paper plate and covered them in plastic wrap so I could save them for picture taking later and within a few hours they lost their delicate texture. Nothing a quick zap in the microwave won't fix, but not ideal nonetheless.
Another note, I didn't have any lemon extract on hand (but after this incident, I will soon), so I took a cue from here and substituted four tablespoons of lemon juice. The result? Sadly not at all lemony. More like sugar cookies with a subtle hint of zest. Good, but just not tempting enough to cram down my mouth. I will, for certain, try this recipe again as soon as I get my hands on some lemon extract. Until then, for all you lemon lovers...don't settle for a substitute!
On a lighter, purely aesthetic note: next time I would definitely opt for rolling these cookies in sparkling sugar. Again, I only had granulated on hand, which lent nothing to the texture. Well, there was turbinado in the pantry, but I didn't want to risk discoloring the cookies with caramel-colored flecks. Just another reason to try it again, I'm missing out on that delicate crunch!
Lemon Sugar Cookies (adapted from Crepes of Wrath)
2 3/4 cups all-purpose flour
1 teaspoon baking soda
1/2 teaspoon baking powder
1/2 teaspoon salt
1 cup butter, softened
1 1/2 cups white sugar
1 egg
1/2 teaspoon vanilla extract
1 1/2 teaspoons lemon extract
zest of 1 lemon
1/2 cup granulated or raw sugar for rolling cookies (I used raw sugar, which I think was an awesome choice)
Preheat the oven to 350 degrees F. Line cookie sheets with parchment paper or tin foil and spray lightly with Pam.
In a small bowl, stir together flour, baking soda, baking powder and salt. Set aside.
Rub together the zest and granulated sugar until the sugar is a pale yellow color. This helps to infuse all of the oils in the zest into the sugar and gives your cookies an even more lemony flavor. Using a mixer, beat together the butter and sugar until smooth and very fluffy (about 3-5 minutes).
Beat in egg, vanilla extract, and lemon extract.
Gradually blend in the dry ingredients and mix until just moistened.
Roll rounded tablespoons of dough into balls, and roll in sugar. Place on lined cookie sheets about 1 1/2 inches apart.
Bake 8 to 10 minutes in the preheated oven, or until lightly golden and set.
Let stand on cookie sheet two minutes before removing to cool on wire racks. As soon as the cookies have cooled, store them in an airtight container to keep them nice and soft. Makes around 20 cookies.
Tuesday, June 29, 2010
I have had my eye on this enticing Baked Doughnuts recipe from 101 cookbooks for months. I have daydreamed in class about simple glazed doughnuts and different jam-filled varieties. And yet, I'm practically half way in to my summer and haven't found the time to tackle a yeast recipe. Or perhaps it's a little bit of moxie that I can't seem to locate. However, I did promise myself that I would get to it sometime before school starts and I have no intention of letting myself down.
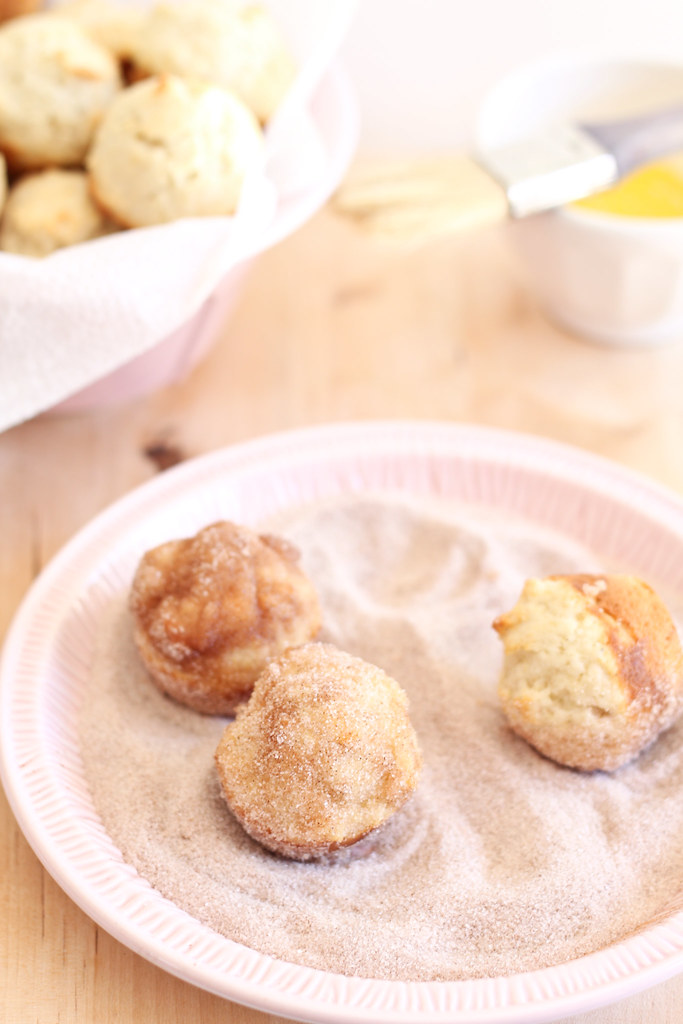
Until then, I had to satiate my doughnut craving with this quick fix solution: doughnut muffins. The recipe is from The Downtown Bakery and Creamery north of the Bay Area in Healdsburg. They claim to sell out of these muffins every morning and I can already see why. The original recipe, which I posted here, yields 24 standard sized muffins. Predictably, I quartered the recipe and made 24 mini-muffins, but each little, melt-in-your-mouth bite is delectable. I'll shamefully admit that I've already eaten somewhere over 6 mini-muffins which is a little under 2 standard muffins...in under an hour. I've since forced myself to clean the kitchen completely and grab myself a glass of water so that I won't have a reason to go into the kitchen for a good couple of hours. I won't lie...doughnut muffins are not the new doughnut. But don't let that stop you from trying them.
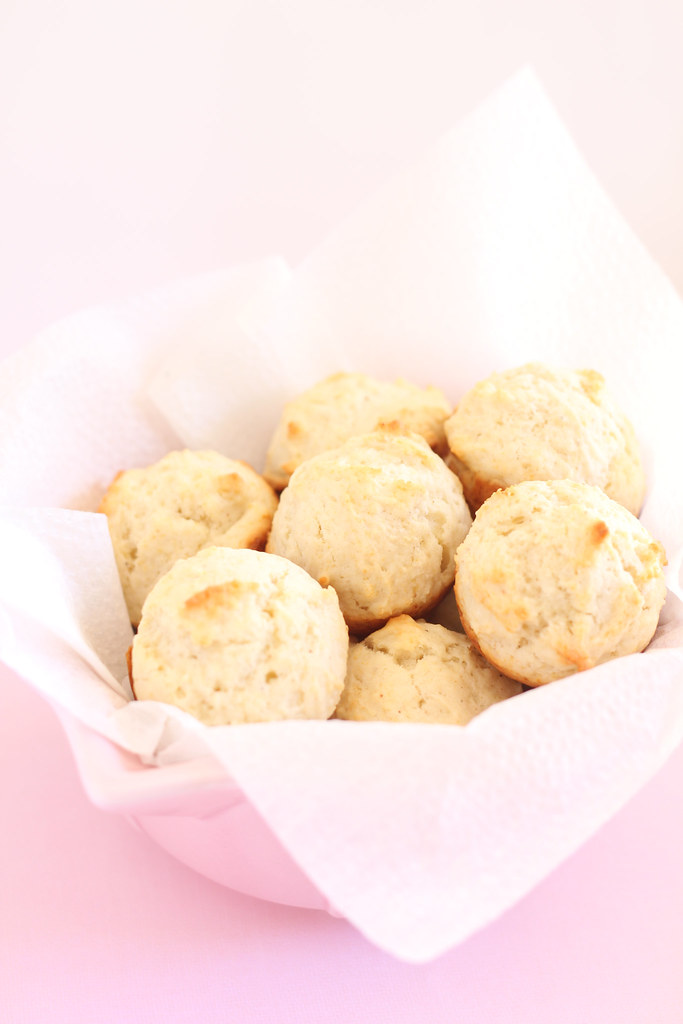
Doughnut Muffins (recipe found here)
makes 24 medium muffins
12 oz. (24 Tbs.) unsalted butter, warmed to room temperature
1-3/4 cups sugar
4 large eggs
1 lb. 11 oz. (6 cups) all-purpose flour
1 Tbs. plus 2 tsp. baking powder
1/2 tsp. baking soda
1-3/4 tsp. salt
1 tsp. ground nutmeg
1-2/3 cups milk
1/4 cup buttermilk
8 oz. (16 Tbs.) unsalted butter; more as needed
2 cups sugar
2 Tbs. ground cinnamon
Put a rack in the middle of the oven and heat the oven to 350°F.
In a stand mixer or a large bowl, cream the butter and sugar. Beat in the eggs, one at a time, until just mixed in. Sift together the flour, baking powder, baking soda, salt, and nutmeg.
Combine the milk and buttermilk. With a wooden spoon, mix a quarter of the dry ingredients into the butter mixture. Then mix in a third of the milk mixture. Continue mixing in the remaining dry and wet ingredients alternately, ending with the dry. Mix until well combined and smooth, but don't overmix.
Grease and flour a standard-size muffin tin. Scoop enough batter into each tin so that the top of the batter is even with the rim of the cup, about 1/2 cup. (A #16 ice-cream scoop gives you the perfect amount.) Bake the muffins until firm to the touch, 30 to 35 min.
Melt the butter for the dipping mixture. Combine the sugar and cinnamon. When the muffins are just cool enough to handle, remove them from the tin, dip them into or brush them all over with the melted butter, and then roll them in the cinnamon sugar.
Tuesday, June 22, 2010
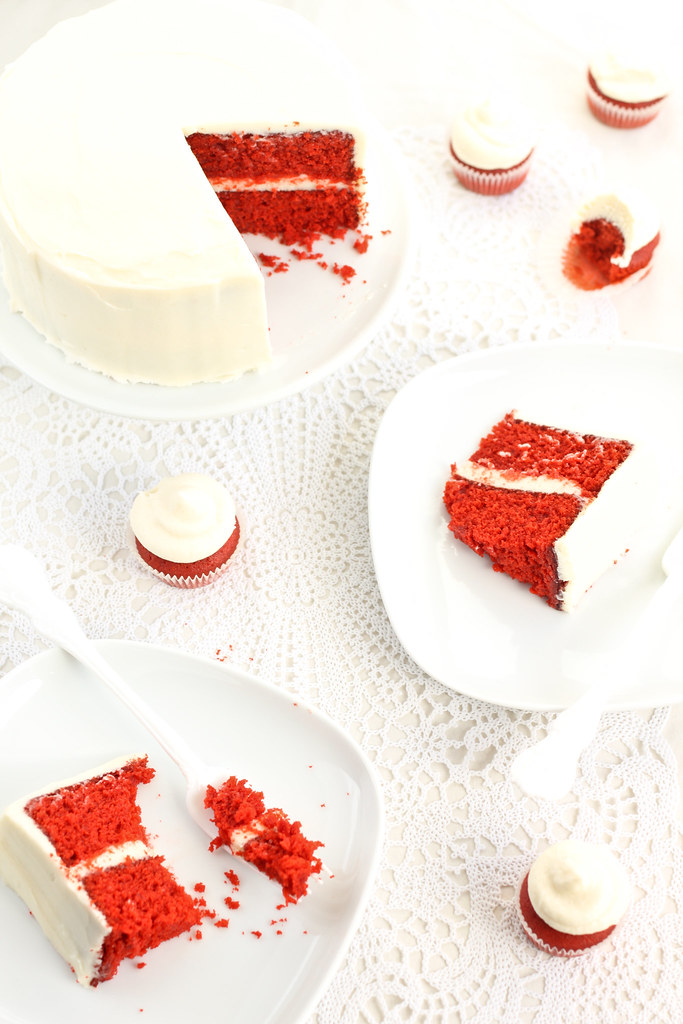
It's so difficult to brainstorm products and prices for people that you know. Not only did I have to come up with something that appeals to their tastes and that they would actually buy (which entails that they either cannot make it themselves or conveniently buy it elsewhere). I remembered often hearing the women mention red velvet cakes before. It seemed perfect, it wasn't a cultural staple, so it wasn't something that most of the women would make on their own. It was also not too simple, as many of the women were already well-seasoned in making their own quick breads, so banana bread for sale was out of the question. Red velvet was the perfect option the more I thought about it.
Then there was the price to consider. After researching prices at most well established bakeries, I found that even a small 6 inch cake can run up over $30. Considering the population of the church, I realized that this would not do. Even with the price above $20 I could already imagine their polite "No Thank You"s. I figured the price had to be low, a low amount of funds is better than no funds at all and I was hoping that the low price would encourage more orders. So, I sold 6 inch red velvet cakes for....$15 dollars. No lie. And for a moment it even pained me to do it, but it all turned out for the better in the end. The cake was very well received and on our first day of taking orders we sold 10 cakes, totaling up to $150 raised on our first go.
This of course means that this Friday, I will be in the church kitchen baking up ten red velvet cakes. And although we'll continue taking orders for more as the weeks go by (I have several requests to make a sugar-free version) I assure you that by the time I get back to school, I will be running out the door if my friends so much as request a Red-Velvet-Anything.
But for now, I give you this cake recipe. The only adaptation I made was altering the prescribed one teaspoon of cocoa powder to two tablespoons. I know, I know there is so much controversy over doing this. However, I had made a half recipe earlier in the week as a batch of mini-cupcakes for an order of 6-dozen (2 dozen lemon with cream cheese, 2 dozen vanilla with chocolate ganache, and 2 dozen red velvet) and the flavor never seemed to develop. To make a six inch cake, I only needed to use half the recipe, but I added a tablespoon of cocoa powder instead and after the cake cooled and I had sliced it and taken my bite of the scraps I immediately screamed for my sister to come down to the kitchen. Even right out of the oven, without maturing, the flavor was so full and complex. That extra hit of cocoa gave the taste so much body without actually being too obviously chocolate, because believe me I am NOT a chocolate fan. Just keep in mind that the recipe posted below makes a three-layer, 9 inch cake. You could make half and end up with a good sized 6 inch or use the other half for cupcakes. All up to you.
*Also, I'm considering making those 6 inch cakes into three-layers instead of two. Well maybe if I ever make it again for myself I'll try it out.
Southern Red Velvet Cake (adapted from Food Network)
2 1/2 cups all-purpose flour
1 1/2 cups sugar
1 teaspoon baking soda
1 teaspoon fine salt
2 tablespoons cocoa powder
1 1/2 cups vegetable oil
2 eggs, room temperature
1 cup buttermilk, at room temperature
red food coloring (as much as desired)
1 teaspoon white distilled vinegar
1 teaspoon vanilla extract
Preheat the oven to 350 degrees F. Lightly butter and flour 3 (9 by 1 1/2-inch round) cake pans.
In a large bowl, sift together the flour, sugar, baking soda, salt, and cocoa powder. In another large bowl, whisk together the oil, buttermilk, eggs, food coloring, vinegar, and vanilla.
Using a standing mixer, mix the dry ingredients into the wet ingredients until just combined and a smooth batter is formed.
Divide the cake batter evenly among the prepared cake pans. Place the pans in the oven evenly spaced apart. Bake, rotating the pans halfway through the cooking, until the cake pulls away from the side of the pans, and a toothpick inserted in the center of the cakes comes out clean, about 30 minutes.
Remove the cakes from the oven and run a knife around the edges to loosen them from the sides of the pans. One at a time, invert the cakes onto a plate and then re-invert them onto a cooling rack, rounded-sides up. Let cool completely.
Cream Cheese Frosting
1 pound cream cheese, softened 4 cups sifted confectioners' sugar 2 sticks unsalted butter (1 cup), softened 1 teaspoon vanilla extract
In a standing mixer fitted with the paddle attachment, or with a hand-held electric mixer in a large bowl, mix the cream cheese, sugar, and butter on low speed until incorporated. Increase the speed to high, and mix until light and fluffy, about 5 minutes. (Occasionally turn the mixer off, and scrape the down the sides of the bowl with a rubber spatula.)
Reduce the speed of the mixer to low. Add the vanilla, raise the speed to high and mix briefly until fluffy (scrape down the bowl occasionally). Store in the refrigerator until somewhat stiff, before using. May be stored in the refrigerator for 3 days.
Assembly
Frost the cake. Place 1 layer, rounded-side down, in the middle of a rotating cake stand. Using a palette knife or offset spatula spread some of the cream cheese frosting over the top of the cake. (Spread enough frosting to make a 1/4 to 1/2-inch layer.) Carefully set another layer on top, rounded-side down, and repeat. Top with the remaining layer and cover the entire cake with the remaining frosting.
Wednesday, June 16, 2010
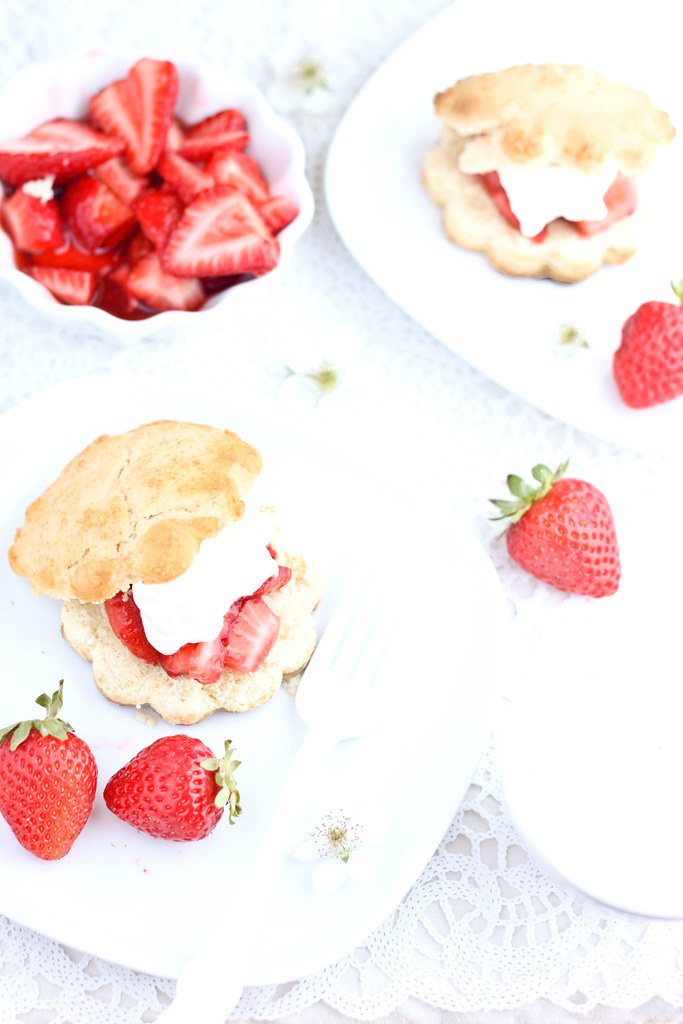
For any of you who have yet to pick up on the pattern, I'll spell it out for you. If you so much as see the word "strawberry", know that the post has my boyfriend all over it. Because of the recent makeover and all my giddy self-satisfaction at doing it all on my own--from the logo to every last, frustrating bit of code--my boyfriend has taken a closer look at my blog, instead of the customary once over. I even received my first "reader complaint" when he noted that I had failed to mention him in the Strawberry Bavarian post. The title of the post clearly shows that I had meant to make mention of it, but my busy school schedule and sheer laziness when it comes to writing here prevented the post from ever developing into more than just a recipe card. The cake was made for my boyfriend's .......th birthday. Funny, I hesitated to announce the age, partly because I'm not sure how much more information my boyfriend minds me posting outside of a mere mention and because I suddenly became worried about dating ourselves by giving his age. Besides, as most of you know, the number itself means little and most people who see that kid in action and then hear his real age are surprised.
I will now simply refer to him as J, because I'm not sure how fond he would be of my previous nickname for him. Anyways, this last Monday was our 34 month anniversary or two months short of three years anniversary...however you choose to look at it. And yes, you can see that we're still silly enough to celebrate our relationship down to the month, but part of me hopes that if we're together ten years from now, we'll still be celebrating our 114 month anniversary, a.k.a our 9 1/2 years anniversary.
As soon as I hinted to J that I would be making him something, he immediately exclaimed "ice cream cake!". I almost went for it too, and began mentally planning out individual ice cream cakes made in ring molds, but inevitably came back to my original idea...strawberry shortcakes. Which surprisingly for a strawberry lover, he has never tried, but he's not the kind to try something new unless under duress. He also stared shocked for a moment when he saw how I had cut the dozen peach roses he had given to me short enough to fit into a mason jar. He had expected for me to leave them long-stemmed and elegant, like he was accustomed to seeing, but I explained that I liked the cozy feel of the simple display.
So the verdict? Success! Despite a few helpless (albeit, adorable) questions about how he should go about eating it, his plate was emptied and scraped in a few minutes and I was finally relieved of enough anticipation to enjoy my own.
As soon as I hinted to J that I would be making him something, he immediately exclaimed "ice cream cake!". I almost went for it too, and began mentally planning out individual ice cream cakes made in ring molds, but inevitably came back to my original idea...strawberry shortcakes. Which surprisingly for a strawberry lover, he has never tried, but he's not the kind to try something new unless under duress. He also stared shocked for a moment when he saw how I had cut the dozen peach roses he had given to me short enough to fit into a mason jar. He had expected for me to leave them long-stemmed and elegant, like he was accustomed to seeing, but I explained that I liked the cozy feel of the simple display.
So the verdict? Success! Despite a few helpless (albeit, adorable) questions about how he should go about eating it, his plate was emptied and scraped in a few minutes and I was finally relieved of enough anticipation to enjoy my own. As for myself, I love the recipe. Too often you encounter dry or flavorless shortcakes, but these were so moist and tender that I couldn't resist taking one to work with separate little containers of sliced strawberries and whipped cream and trying to assemble it without anyone noticing and sneak it back to my desk to enjoy.
This recipe came from a recent Tuesdays with Dorie, though I don't know if I can officially claim to have participated seeing as I am two weeks late. You can find the recipe over at The Tortefeasor.
Thursday, May 20, 2010
Summer is finally here! Well, supposedly. Finals are through, school is out, and I'm still alive. However, this temperamental Bay Area weather indicates anything but. Add in the fact that few other colleges let out this early and that I started working a full time job two days after my vacation started and you've got the perfect formula for the anti-summer.
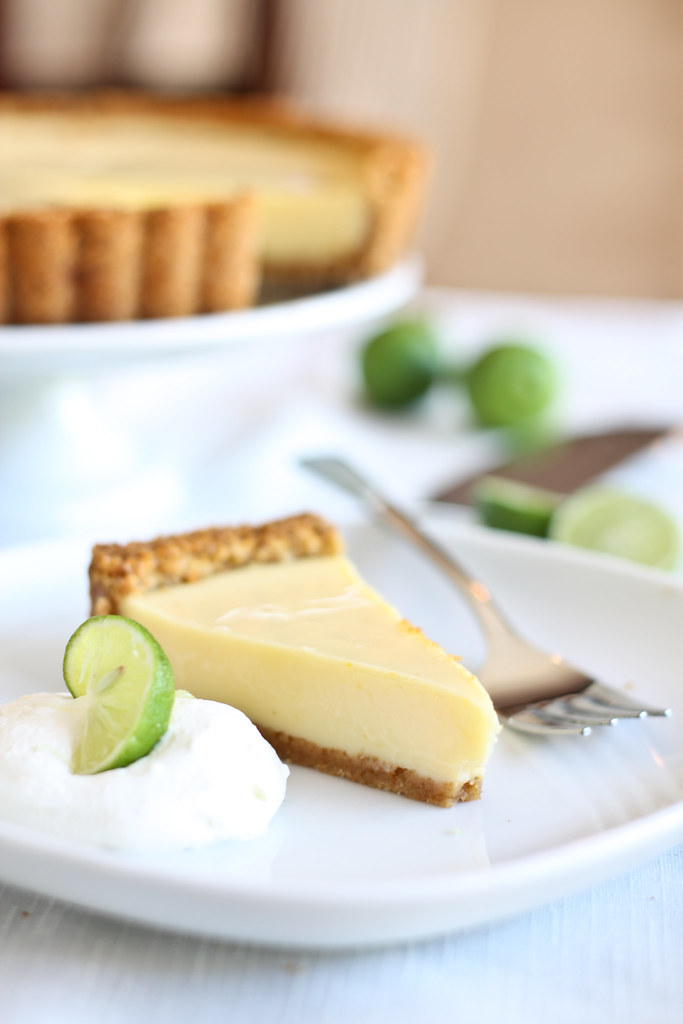
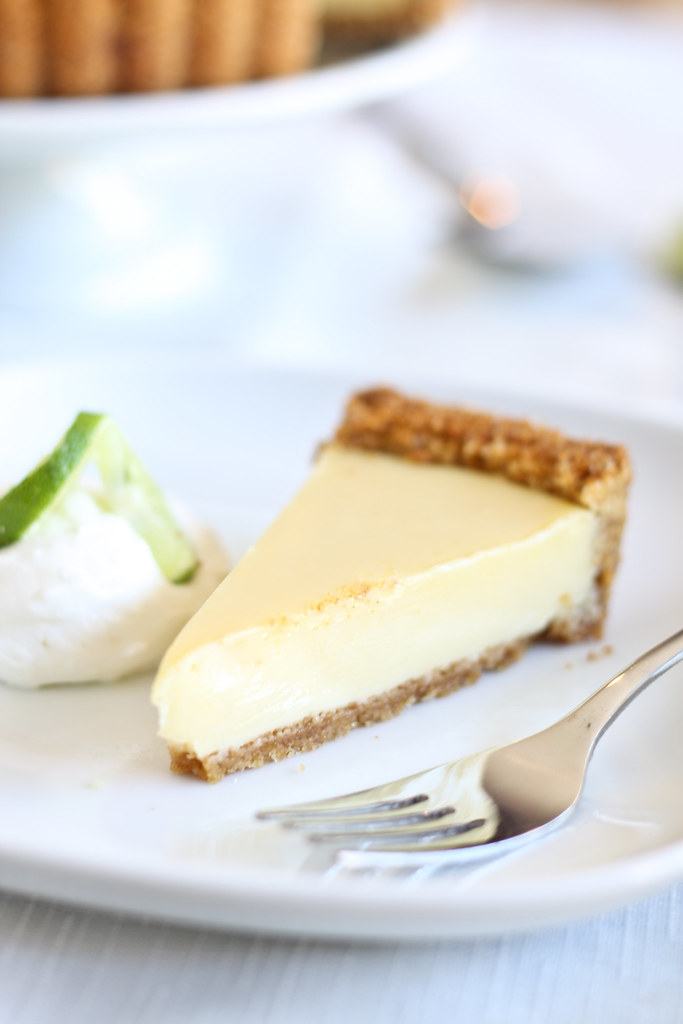
The only way I could convince myself otherwise was to make key lime pie. I few months earlier I spotted bags of key limes being sold at Food Max and I took this as a sign that it was finally time to try my hand at this iconic dessert. Of course, this was in the dead of winter and on top of being buried in weekly exams and hospital clinical days, I was still craving the comfort of warm, cozy baked goods.
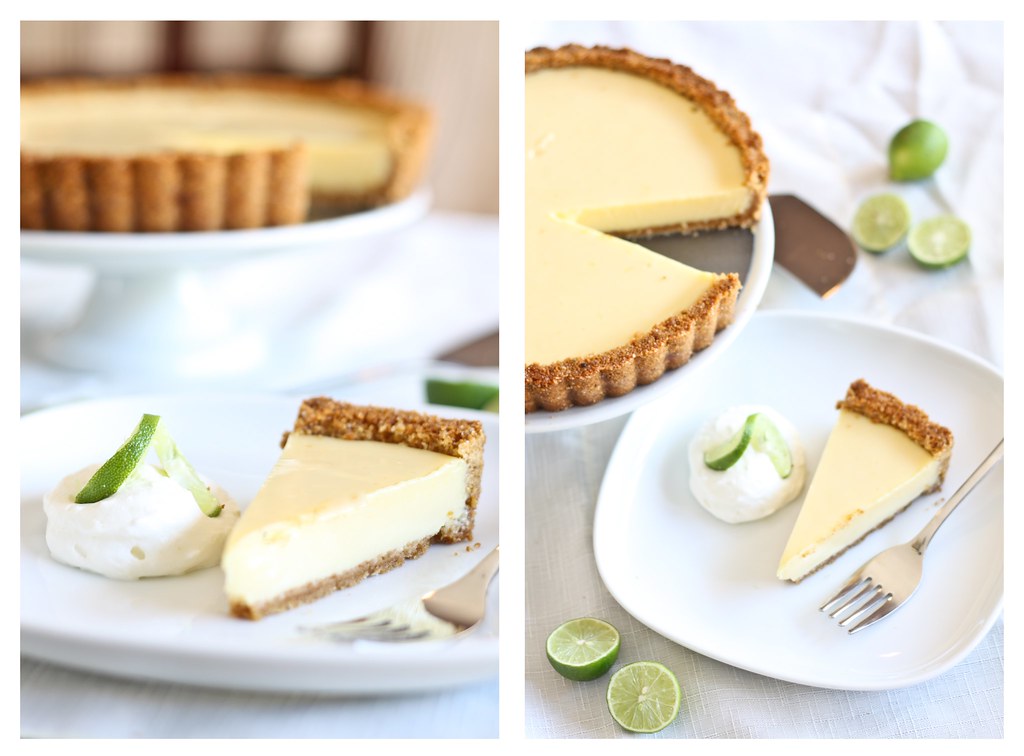
Only a few minutes into my undertaking I realized that it was a good idea that I had decided to wait until my vacation to try this recipe. Although I halved the recipe and needed only half a cup of key lime juice, it took over thirty minutes just to squeeze out enough juice from those tiny little buggers and they left my fingers stinging. Fortunately for me, the rest of the recipe is cake, well you know what I mean. Some people bake their key lime pies with zest in the filling, which I'm sure adds even more delightful tartness. However, I just couldn't bring myself to blemish the pristine, marble-like custard. Instead I opted to add zest to the graham cracker crust, which I enjoyed just as much. The bright, green flecks of zest added just the right amount of zing and quirk to the pie. Key lime pie is notorious for being deceivingly light, yet calorie laden so I spared myself a fraction of the guilt by making it in tart form. I'll post the amounts that I used and if you'd like to make a full size pie you could easily double the ingredients--note though that you might end up with a little more filling than you need, but I'm sure you can find something to do with that.
Key Lime Pie (adapted from Allrecipes.com)
makes one 8-inch tart
4 egg yolks, beaten
1 (14 ounce) can sweetened condensed milk
1/2 cup key lime juice
1 cup finely ground graham cracker crumbs
1/4 cup white sugar
1/4 cup unsalted butter, melted
zest of a few key limes
Preheat oven to 375 degrees F.
Mix graham cracker crumbs, sugar, butter, and zest until well blended. Press mixture into an 8-inch tart plate.
Combine the egg yolks, sweetened condensed milk and lime juice. Mix well and pour into unbaked graham cracker shell.
Bake in preheated oven for 15 minutes. Allow to cool and refrigerate for at least one hour or overnight before serving.
Friday, April 2, 2010
Strawberry Bavarian adapted from Tartine via No Special Effects
Chiffon Cake
160 g (1 cup plus 2 tablespoons) all-purpose flour
1 teaspoon baking powder
150 g (3/4 cup) sugar
1/2 teaspoon salt
55 g (1/4 cup) vegetable oil
3 large egg yolks, at room temperature
88 g (6 tablespoons) water
1 teaspoon vanilla extract
3/4 teaspoon grated lemon zest
5 large egg whites, at room temperature
small pinch cream of tartar (1/8 teaspoon if you must)
Line the bottom of an 8-inch cake pan or ring (at least 2-1/2 inches high) with parchment paper cut to fit exactly; don't grease the pan. Preheat the oven to 160°C (325°F).
In a large mixing bowl, whisk together the oil, egg yolks, water, vanilla, lemon zest, salt, baking powder, and 125g (1 cup and 2 tablespoons) sugar until combined. Sift the flour over this, at the same time whisking until very smooth.
In another large mixing bowl, beat the egg whites until frothy, then add the cream of tartar and beat on medium-high speed until it holds soft peaks. Add the remaining 25g (2 tablespoons) sugar slowly while beating on medium-high speed until the whites hold firm, shiny peaks. Add a third of the egg whites and fold into the yolk mixture to lighten, then fold in the rest of the whites until just combined.
Pour the batter into the pan and spin it around to flatten the batter. Bake until a toothpick inserted in the center comes out clean, about 30-40 minutes. Let cool in the pan on a wire rack. Once completely cool, run a thin knife around the sides and invert onto your hand (a little crust loss is okay since it'll be covered with cream, but you may also invert onto a sheet of parchment sprayed with baking spray if you wish), then place right-side up on a platter. Measure the height of the cake and split it horizontally into two layers of equal height. Carefully separate the layers.
Bavarian
250 g (1 cup) milk
1/2 vanilla bean
small pinch of salt
2 tablespoons cornstarch
58 g (4 1/2 tablespoons) sugar
1 large egg
27 g (2 tablespoons) unsalted butter
3/4 teaspoons gelatin
1/2 tablespoon water
250 g (1 cup) heavy cream, very cold
Make the pastry cream: In a small saucepan, add the milk and scrape the vanilla caviar into it, then throw the pod and salt in. Heat the milk gently, whisking constantly, until small bubbles start to appear on the sides. Remove from the heat. In a small mixing bowl, whisk together the cornstarch, sugar, and egg until a paste is formed. Pour the milk into the paste in a thin stream, whisking madly all the while. Return this to the saucepan and place over low heat, constantly whisking until the bubbles just disappear, about a minute. Immediately remove from the heat and place into a cool bowl. When it comes down to about 60°C (140°F), whisk in the butter until incorporated. Leave to cool completely, then place cling film flush against the surface and place in the fridge.
In a small dish, sprinkle the gelatin over the water and let stand for a few minutes. Take 60g (1/4 cup) of the pastry cream and heat it in a microwaveable bowl at LOW in 10-second intervals, or in a heatproof bowl over simmering water until it is hot to the touch. Remove from the heat and whisk in the gelatin water until smooth. Whisk in half the remaining cold pastry cream until well-combined, then the remaining pastry cream.
Whip the cream using a cold bowl and beaters until it holds medium-stiff peaks, then fold in the pastry cream mixture.
Fruit Puree
85g (slightly more than 1/2 cup) berries (I used strawberries)
25g (2 tablespoons) sugar
pinch of salt
Combine the three ingredients in a blender until smooth.
Assembly
150 g (1/2 cup plus 2 tablespoons) heavy cream, very cold
2 teaspoons sugar
285 g (10 oz or a pint) strawberries
Whip the cream and sugar using a cold bowl and beaters until it hold soft peaks.
Use an 8" cake ring or springform pan to assemble. Line the sides with plastic wrap, or as I did, a strip of food grade acetate. Place a cake board cut to 8" diameter on the bottom, then the bottom layer of cake. Brush this with half the fruit puree. Spoon on half the filling, then arrange the fresh fruit over this (if using strawberries, start with the sides, using halved strawberries). Dump the remaining filling over this, using an offset spatula to go over the surface to make sure there are no large air pockets. Place the top layer of cake over this push lightly over the top to compress the filling. Moisten the top layer with the remaining fruit puree. Frost the top with the sweetened whip cream, taking care not to bleed the color of the puree into it (spoon the cream over the whole surface, then fix it with an offset spatula). Refrigerate for at least 4 hours. Unmold and remove the plastic wrap or acetate before serving.
Saturday, February 20, 2010
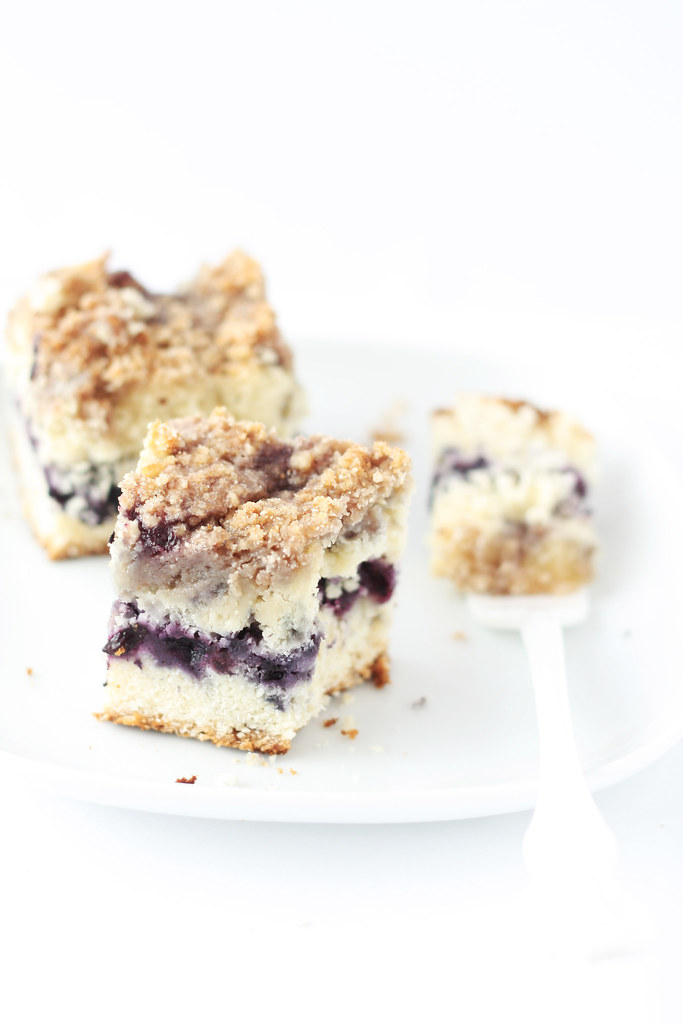
- Blueberry Crumb Cake
- 3/4 cup white sugar
- 1/4 cup butter
- 1 egg
- 1/4 cup milk
- 1/4 cup heavy cream
- 1 1/2 cups all-purpose flour
- 2 teaspoons baking powder
- 1/2 teaspoon salt
- 2 cups fresh blueberries
- 1/4 cup white sugar
- 1/4 cup brown sugar
- 1/3 cup all-purpose flour
- 1/2 teaspoon ground cinnamon
- 1/4 cup butter, softened
- Preheat oven to 350 degrees F. Grease one 8x8 inch pan.
- Cream together 3/4 cup sugar, butter, and egg.
- In a separate bowl mix together 1 1/2 cups flour, baking powder, and salt. Stir into sugar mixture, alternating with milk. Stir in blueberries. Pour into greased 8x8 inch pan.
- To make topping: Combine 1/4 cup white sugar, 1/4 cup brown sugar, 1/3 cup flour, cinnamon, and butter. Sprinkle over cake batter.
- Bake at 350 degree F for 30-40 minutes.
Monday, February 15, 2010
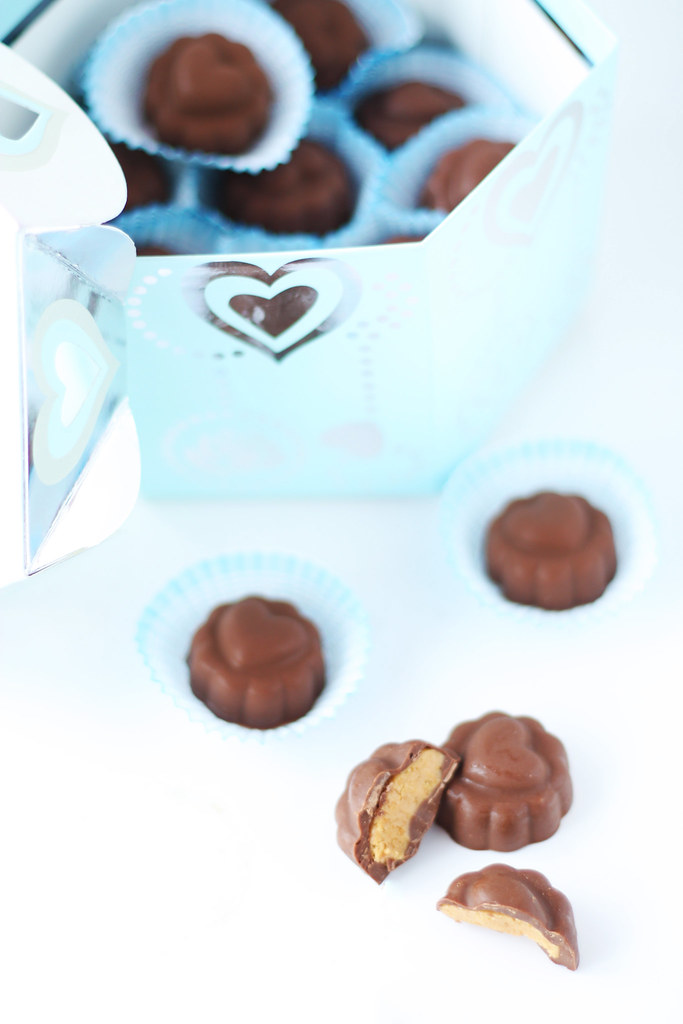
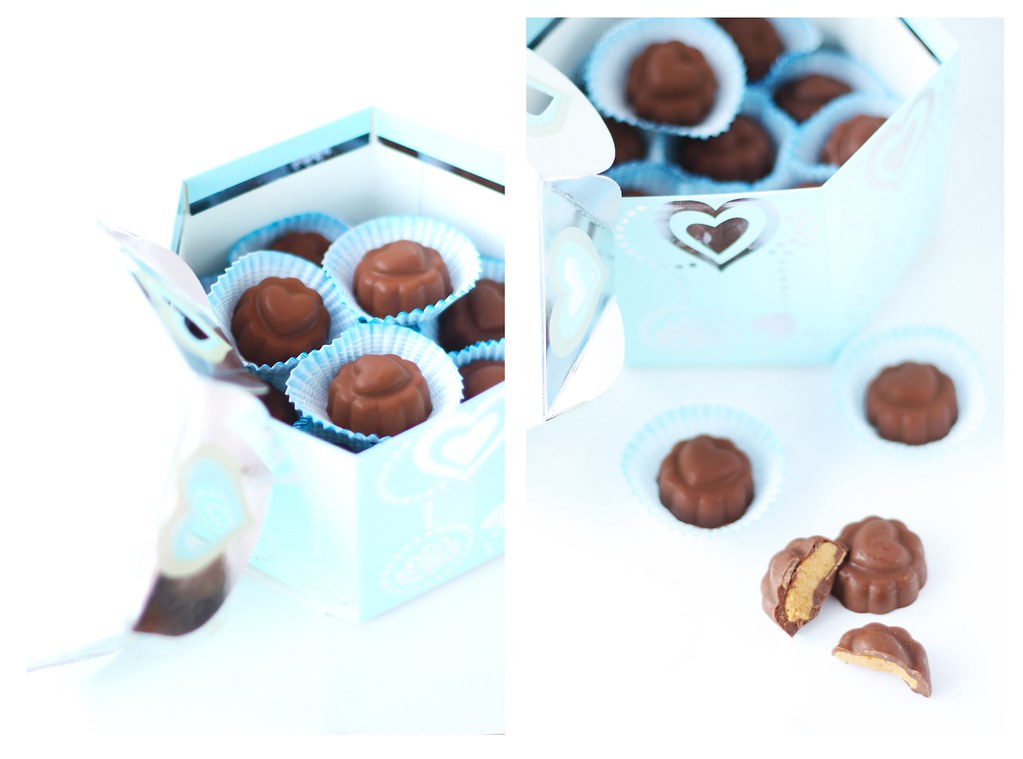
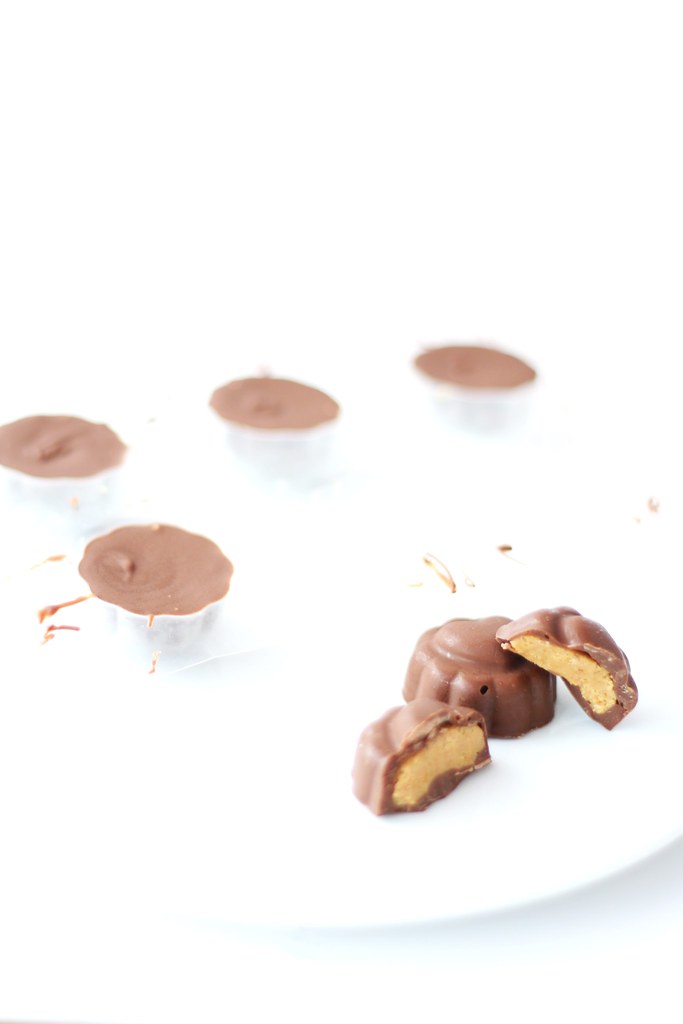
Deciding on a Valentine's Day gift for my boyfriend can be too difficult these days, especially because my boyfriend has a very small and picky sweet tooth...in our case, opposites do attract. You can imagine how overjoyed I was when I watched a big, satisfying smile appear on his face as he bit into (well, more like popped a whole one into his mouth) one of these and deemed it "perfect".
Milk Chocolate Peanut Butter Cups (adapted from Pete Bakes)
12 oz milk chocolate *see Note
1/3 cup creamy peanut butter (I added a couple more tablespoons to suit my preference)
1/4 cup confectioners’ sugar
1 tsp salt (not in the original recipe, but you can omit it, or add more or less depending on your taste)
1/4 cup crushed graham crackers
*I actually ended up with a lot of chocolate left over, so for easy storage I poured the chocolate into the molds I used and let them set up so that I could have solid, portionable pieces. If you want to avoid this problem, and don't feel too lazy, melt a little bit of chocolate at a time, so as not to waste any.
1. in a bowl, mix together the peanut butter, confectioners’ sugar and graham crackers. set aside.
2. in a double boiler, carefully melt the chocolate (set a metal bowl on top of a saucepan with boiling water). alternatively, you can microwave the chocolate in short bursts.
3. using a pastry brush or a clean paintbrush, brush the melted chocolate on the bottom and sides of mini cupcake liners. it’s helpful to stack some the liners together to give more support. when in doubt, add more chocolate, since this will be the base for your candy. place the cupcake liners on a plate or in a cupcake tin and place in the freezer for 10 minutes.
4. remove the liners from the freezer, and place about one teaspoon of the peanut butter mixture in each cup. press down a bit with a spoon to spread. spoon more melted chocolate on top of each cup.
5. place the peanut butter cups back in the freezer for another 15 minutes to set. eat cold or let warm to room temperature before serving.
Thursday, February 11, 2010
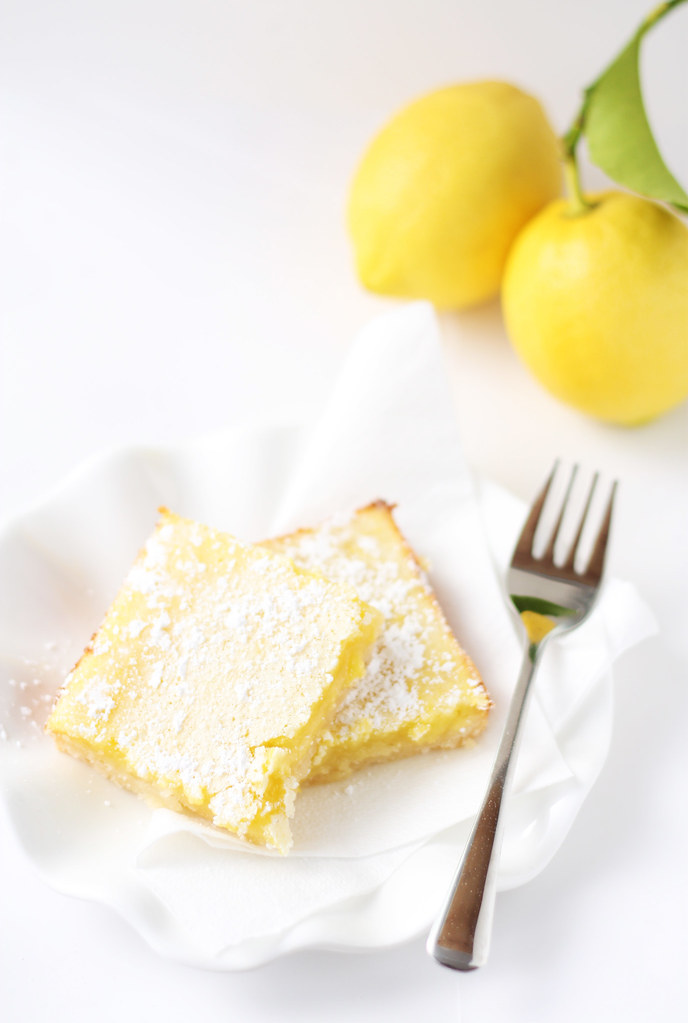
- 1 cup all-purpose flour
- 1/4 cup and 3 tablespoons confectioners' sugar
- 1/2 cup butter or margarine, softened
- 4 eggs
- 1 1/2 cups sugar
- 1/4 cup all-purpose flour
- 2/3 cup lemon juice
- confectioners' sugar for decoration
From: Baking: From My Home To Yours, written by Dorie Greenspan.
Ingredients:
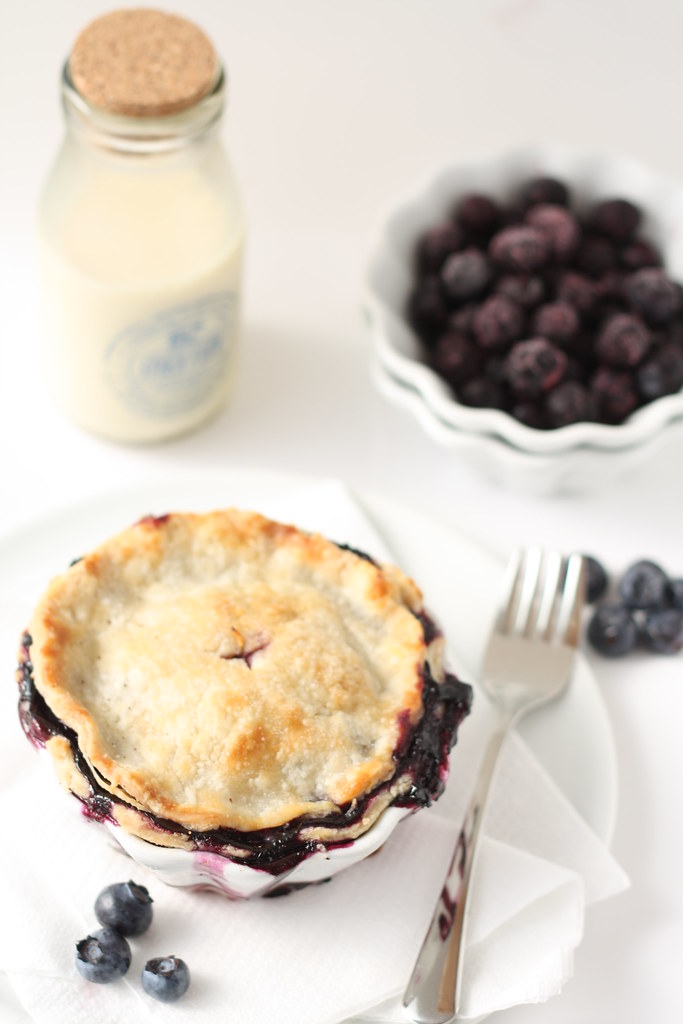
Good for Almost Everything Pie Dough for Double Crust , chilled (below)
2 ½ pints fresh blueberries
1 cup of sugar, or a little more, to taste, plus more for dusting
½ cup all purpose flour
Pinch of salt
Coarsely grated zest of ½ lemon
Squirt of fresh lemon juice, or a little more, to taste
¼ cup dry bread crumbs (you can use packaged unseasoned crumbs)
1 large egg, beaten with 1 tsp of water, for egg wash
Sugar, for dusting
Getting Ready: Butter a 9-inch pie plate (Dorie uses a standard Pyrex pie plate).
Working on a well-floured surface (or between wax paper or plastic wrap), roll out one piece of the dough to a thickness of about 1/8 – inch. Fit the dough onto the buttered pie plate and trim the edges to a ½ inch overhang. Roll the other piece of dough into a 1/8 inch thick circle and place it on a baking sheet lined with parchment or a silicone mat. Cover both the circle and the pie plate with plastic wrap and refrigerate while you pre-heat the oven and prepare the filling.
Getting Ready to Bake: Position a rack in the lower third of the oven and pre-heat the oven to 425 degrees F.
Put the berries in a large bowl and gently stir in the sugar, flour, salt, zest and juice; let sit for about 5 minutes. Taste the filling and add more sugar and/or lemon juice, if needed.
Remove the pie shell and top crust from the refrigerator. Sprinkle an even layer of the breadcrumbs over the bottom of the shell. Give the filling a last stir and turn it into the crust.
Using your fingertips, moisten the rim of the bottom crust with a little cold water. Center the top crust over the filling and gently press the top crust against the bottom. Either fold the overhang from the top crust under the bottom crust and crimp the edges attractively or press the top crust against the bottom crust and trim the overhang from both crusts even with the rim of the pie plate. If you’ve pressed and trimmed the crust, use the tines of a fork to press the two crusts together securely. Using a small, sharp knife, cut 4 slits in the top crust crust and cut a circle out of the center, then lift the plate onto the baking sheet. (If you have time, refrigerate the pie for about 30 minutes. The pie can also be wrapped airtight and frozen for up to 2 months. Glaze and sugar it before you put it in the over and add at least 15 minutes to the baking time).
Brush the top crust with the egg wash, then sprinkle the crust with a little sugar, just to give it sparkle.
Bake the pie for 30 minutes. Reduce oven temperature to 375 degrees F, and bake the pie for another 30 minutes or so (total baking time is about an hour) or until the crust is a beautiful golden brown and the filling is bubbling up through the slits. If the crust seems to be browning too quickly, make a loose foil tent for the pie.
Transfer the pie to a rack and let it cool and settle for at least 30 minutes before serving.
Good for Almost Everything Pie Dough
For a 9 inch Double Crust
3 cups all purpose flour
¼ cup sugar
1 ½ tsp salt
2 ½ sticks very cold unsalted butter, cut into tbsp size pieces
1/3 cup very cold vegetable shortening, cut into 4 pieces (I opted for all butter, just my preference)
About ½ cup ice water
Put the flour, sugar, and salt in a food processor fitted with a metal blade, pulse just to combine the ingredients. Drop in the butter and shortening and pulse only until the butter and shortening are cut into the flour. Don’t overdo the mixing- what you’re aiming for is to have some pieces the size of fat green peas and others the size of barley. Pulsing the machine on and off, gradually add about 6 tbsps of the water- add a little water and pulse once, add some more water, pulse again and keep going that way. Then use a few long pulses to get the water into the flour. If, after a dozen or so pulses, the dough doesn’t look evenly moistened or form soft curds, pulse in as much of the remaining water as necessary, or even a few drops more, to get a dough that will stick together when pinched. Big pieces of butter are fine. Scrape the dough out of the bowl and onto a work surface.
Divide the dough in half. Gather each half into a ball, flatten each ball into a disk and wrap each half in plastic. Refrigerate the dough for at least 1 hour before rolling (if your ingredients were very cold and you worked quickly, though, you might be able to roll the dough immediately: the dough should be as cold as if it had just come out of the fridge).
To Roll Out the Dough: Have a buttered 9 inch pie plate at hand.
You can roll the dough out onto a floured surface or between sheets of wax paper or plastic wrap or in a rolling slipcover. If you’re working on a counter, turn the dough over frequently and keep the counter floured. If you are rolling between paper, plastic or in a slipcover, make sure to turn the dough over often and to life the paper, plastic, or cover frequently so that it doesn’t roll into the dough and form creases.
If you’ve got time, slide the rolled out dough into the fridge for about 20 minutes to rest and firm up.
Thursday, February 4, 2010
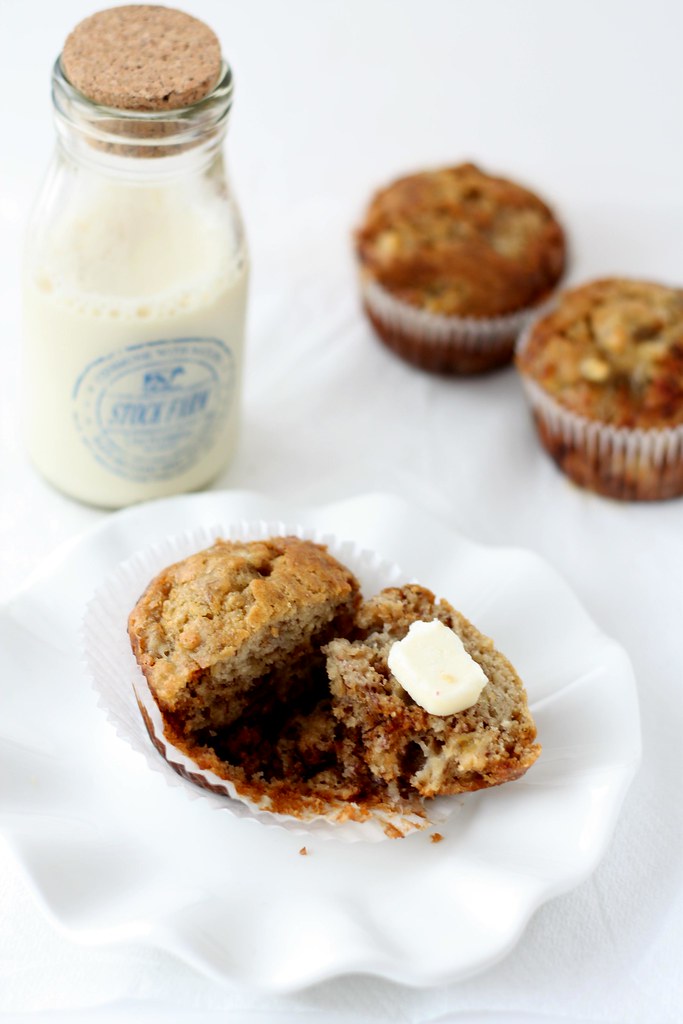
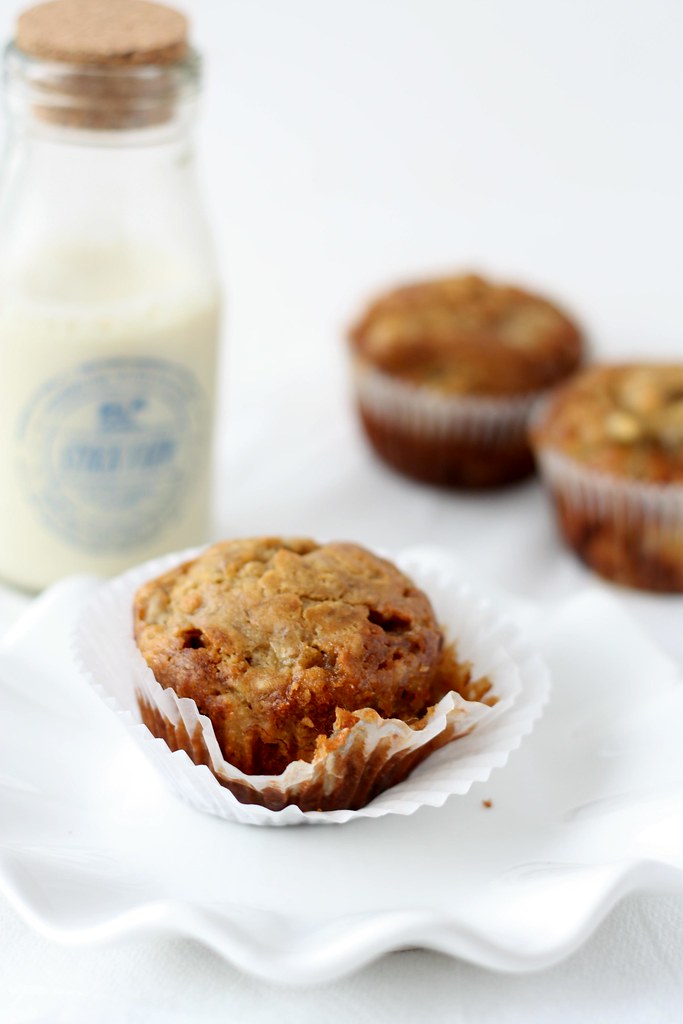
Banana Bread Muffins
2 cups all-purpose flour
1 teaspoon baking soda
1/4 teaspoon salt
1/2 cup butter
3/4 cup brown sugar
2 eggs, beaten
2 1/3 cups mashed overripe bananas
Preheat oven to 350 degrees F (175 degrees C). Lightly grease a 9x5 inch loaf pan.
In a large bowl, combine flour, baking soda and salt. In a separate bowl, cream together butter and brown sugar. Stir in eggs and mashed bananas until well blended. Stir banana mixture into flour mixture; stir just to moisten. Pour batter into prepared loaf pan.
Bake in preheated oven for 60 to 65 minutes, until a toothpick inserted into center of the loaf comes out clean. Let bread cool in pan for 10 minutes, then turn out onto a wire rack.
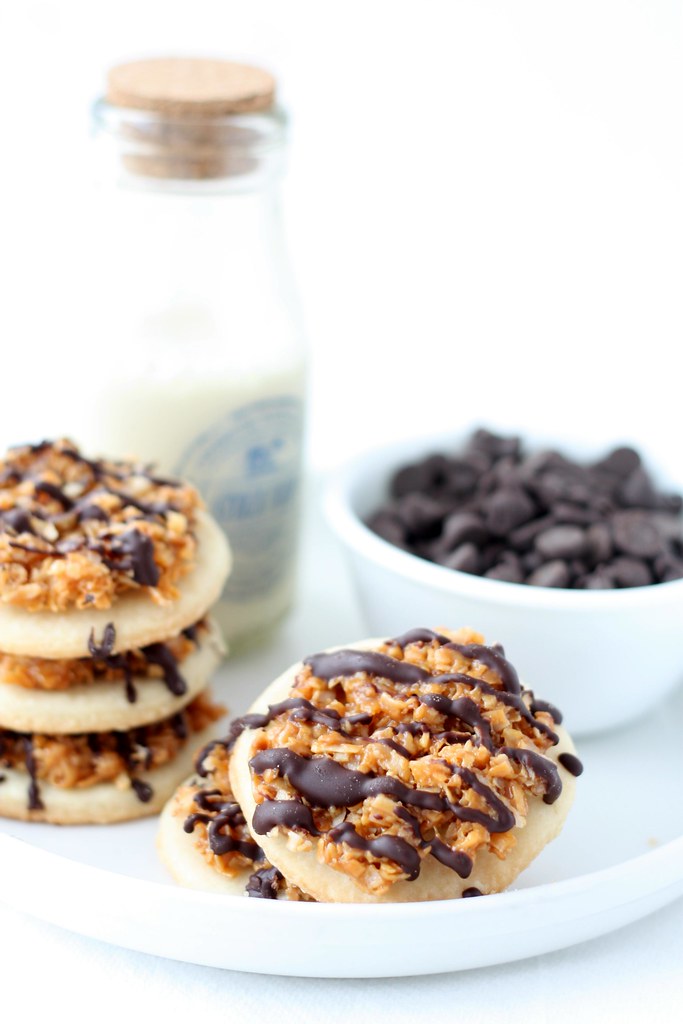
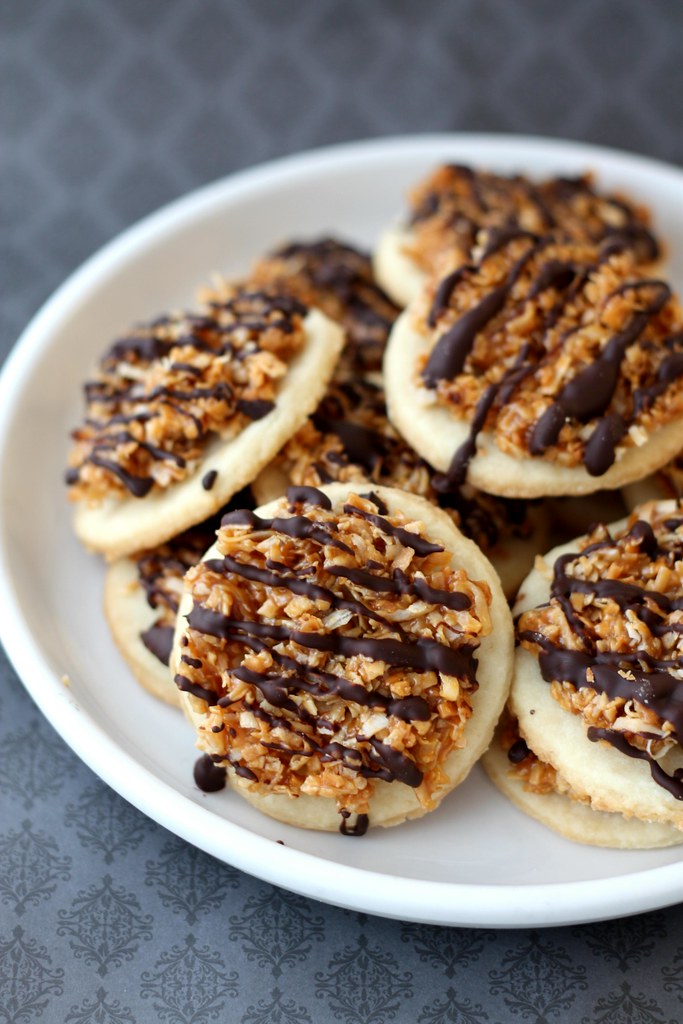 I had my very first Samoas cookie rather recently while visiting my sister-in-law and her husband last year. Apparently, they're his favorite and as we were all out shopping he was immediately drawn to the Girl Scouts who had set up camp outside and returned triumphantly with several boxes of these babies. So, appropriately, I thought I'd make them for real (real as in sans preservatives and novel-sized ingredient list) and bring them along for our next visit. I deviated from the recipe a bit by opting out of dipping the bottom of the cookies in chocolate...that's just too much chocolate for me...and now no worry about melty-chocolately fingers.
Samoas Cookies (adapted from Baking Bites)
1 cup butter, softened
1/2 cup sugar
2 cups all purpose flour
1/4 teaspoon baking powder
1/2 teaspoon salt
1/2 teaspoon vanilla extract
up to 2 tablespoons milk
Preheat oven to 350F.
Cream together butter and sugar in a large bowl. Mix in flour, baking powder and salt at a low speed, next, the vanilla and milk, adding in the milk only as needed to make the dough come together without being sticky (you may not need any at all). The dough should come together into a soft, pliable ball. Add in a bit of extra flour if your dough seems sticky.
It's easiest to roll the dough out in 2 or 3 batches (between pieces of wax (or parchment) paper to about 1/4-inch thickness (or a little thinner) using a 1 1/2-inch cookie cutter to make rounds. Place on a parchment lined (or on silicone mat) baking sheet and make a hole in the center. I used the small end of a large round piping tip. Nicole comments that you can use a knife, or the end of a wide straw, to cut a smaller center hole. Repeat until the dough is used up (it's okay to re-roll, this dough is shortbread-like and very forgiving.)
Bake cookies for 10-12 minutes, until bottoms are very lightly golden brown around the edges.
Cool for a few minutes on the baking sheet, to allow them to firm up slightly, then transfer to a wire rack to cool completely.
Topping:
3 cups shredded coconut (sweetened or unsweetened)
12-ounces good-quality chewy caramels
1/4 teaspoon salt
3 tablespoons milk
8 ounces dark or semisweet chocolate (or milk chocolate, if you prefer)
Preheat oven to 300 degrees (F)
Spread coconut evenly on a rimmed baking sheet and toast 20 minutes, stirring every 5 minutes, until coconut is golden. Watch carefully, especially near the end of toasting time; the coconut toasts very quickly once it begins to become golden.
Cool on baking sheet, stirring occasionally. Set aside.
Unwrap the caramels and place in a large microwave-safe bowl with milk and salt. Cook on high for 3-4 minutes, stopping to stir a few times to help the caramel melt. When smooth, fold in toasted coconut with a spatula.
Using the spatula or a small offset spatula, spread topping on cooled cookies, using about 2-3 teaspoons per cookie. Reheat caramel for a few seconds in the microwave if it begins to firm up, to make it soft and spreadable once again.
While topping sets up, melt chocolate in a small bowl. Heat on high in the microwave in 45 second intervals, stirring thoroughly to prevent scorching. (I melted mine stovetop using double boiler method.) Dip the base of each cookie into the chocolate and place on a clean piece of parchment paper (I used silicone baking mats instead). Transfer all remaining chocolate into a piping bag or a ziplock bag with the corner snipped off and drizzle finished cookies with chocolate. (Melt a bit of additional chocolate, if there is not quite enough for each cookie.)
Let chocolate set completely before storing in an airtight container.Thursday, January 14, 2010
In Anaheim now as I type this, getting ready for a fun weekend at Disneyland. As another birthday nears, I'm thankful for having a sister and friends who are always exciting and young at heart, to remind me not to worry about growing up too fast. I doubt I'd ever have as much fun here without them, I wouldn't know where to start. This weekend is a reunion for my sister and I with our childhood friend from Las Vegas who has always been there for me to talk about all things food. So now after all these months I finally get to treat her to something more than a pretty picture and decided to whip up these blondies last minute (a little too last minute considering I was a few minutes late for work due to the delay). But it was worth it, especially to wake up and hear her and my sister last night take a bite of one as I laid half asleep in the other room. My biggest worry was that they would harden up once they were cool, but a quick sneak into the kitchen to rip off a corner of one and savor a bite proved that they remained irresistibly tender and delicious, even straight out of the refrigerator. Must have been Disney magic. White Chocolate Toffee Blondies 2 cups all-purpose flour Getting Ready: Center a rack in the oven and preheat the oven to 325 degrees F. Butter a 9×13-inch baking pan and put it on a baking sheet. Whisk together the flour, baking powder, baking soda and salt. Working with a stand mixer, preferably fitted with a paddle attachment, or with a hand mixer in a large bowl, beat the butter on medium speed until smooth and creamy. Add both sugars and beat for another 3 minutes, or until well incorporated. Add the eggs one by one, beating for 1 minute after each addition, then beat in the vanilla. Reduce the mixer speed to low and add the dry ingredients, mixing just until they disappear into the batter. Using a rubber spatula, stir in the chocolate and toffee. Scrape the batter into the buttered pan and use the spatula to even the top as best you can. Bake for about 40 minutes, or until a knife inserted into the center of the blondies comes out clean. The blondies should pull away from the sides of the pan a little and the top should be a nice honey brown. Transfer the pan to a rack and cool for about 15 minutes before turning the blondies out onto another rack. Invert onto a rack and cool the blondies to room temperature right side up. Cut into 32 bars, each roughly 2-1/4 x 1-1/2 inches.
adapted from Dorie Greenspan “Baking: From My Home to Yours”
3/4 teaspoon baking powder
1/2 teaspoon baking soda
1/2 teaspoon salt
2 sticks (8 ounces) unsalted butter, at room temperature
1 1/2 cups (packed) light brown sugar
1/2 cup sugar
2 large eggs
1 teaspoon pure vanilla extract
6 ounces bittersweet chocolate (I used white chocolate)
1 cup butterscotch chips or Heath Toffee Bits (I used 1/2 cup toffee bits, plus a roughly chopped Heath bar for extra texture)





.jpg)